How I Created My 2018 Christmas Card

The image above is my 2018 Christmas card. It was created using the Persistence on Vision Ray Tracer also known as POV-Ray. I’ve created a Christmas card every year since 1995 using the software.

This year’s image is a little bit simpler than most. I’ve sort of run out of ideas. You can see a gallery of all my Christmas card images on my Facebook page at this link.

Here is a YouTube video explaining a little bit about the history of the card and other images which inspired it.

Years ago there was a program called “SUDS” that was supposed to create spheres that touched one another like bubbles in soapsuds. It was used to create some other classic POV-Ray images. I couldn’t find a copy of the program but POV-Team leader Chris Cason was able to locate an old copy. Unfortunately it was compiled for 16-bit Windows and would not run on a modern 64-bit Windows system. It did include the source code and I tried to translate the code into the POV scene description language. But I never did get decent results. I think it was designed to create spheres of widely different diameters large and small so that the small ones would fill in the gaps. I wanted something where the variability of the diameters was not so significant.

In the end, I just created my own algorithm for randomly placing the spheres. It would pick a random X/Y coordinate and then dropped the ball down on the Z-axis until it hit the bottom or it touched another sphere. My intent was to continue the process so that once it touched it would then rotate downward until it made contact with at least one or two other spheres but that was going to be too complicated and I never did implement it.

When you randomly place objects, you can still have large gaps so I had to put way more spheres than would normally be necessary to fill the image. I just kept adding more and more spheres until I had filled almost all the gaps. Residency in the video I cropped the image so that many of the spheres are outside the actual visible area and many others are hidden behind the top layers.

I then manually placed the 14 spheres spelling out the words “Merry Christmas”. Each of the 14 spheres has an image map of the letter embossed on to it.

Although it looks likely Merry Christmas ornaments are approximately the same level, if you watch the YouTube video which rotates the scene at a different angle, you can see that those lettered ornaments are actually as one quite different heights. Only when you rotate the into the right perspective doesn’t make the words visible.

Some point I will go back and rewrite the algorithm so that the spheres drop down into place properly and fill in the gaps more realistically but for purposes of this image it was good enough as well as viewed from a straight on perspective.

Here is what the interior of the card looks like.


My 2017 Christmas Card: Santa Adopts New Technology

Every year since 1995 I created my own custom designed Christmas cards. All but one of them have used computer graphics rendering using the Persistence of Vision Ray Tracer (POV-Ray). Last year I did a photograph of some 3D printed figures that re-created the scene from my 1995 card. In recent years because I’ve run out of ideas, I’ve sort of recycled previous years cards with updates and tweaks. It’s been since 2014 that I created an original card.

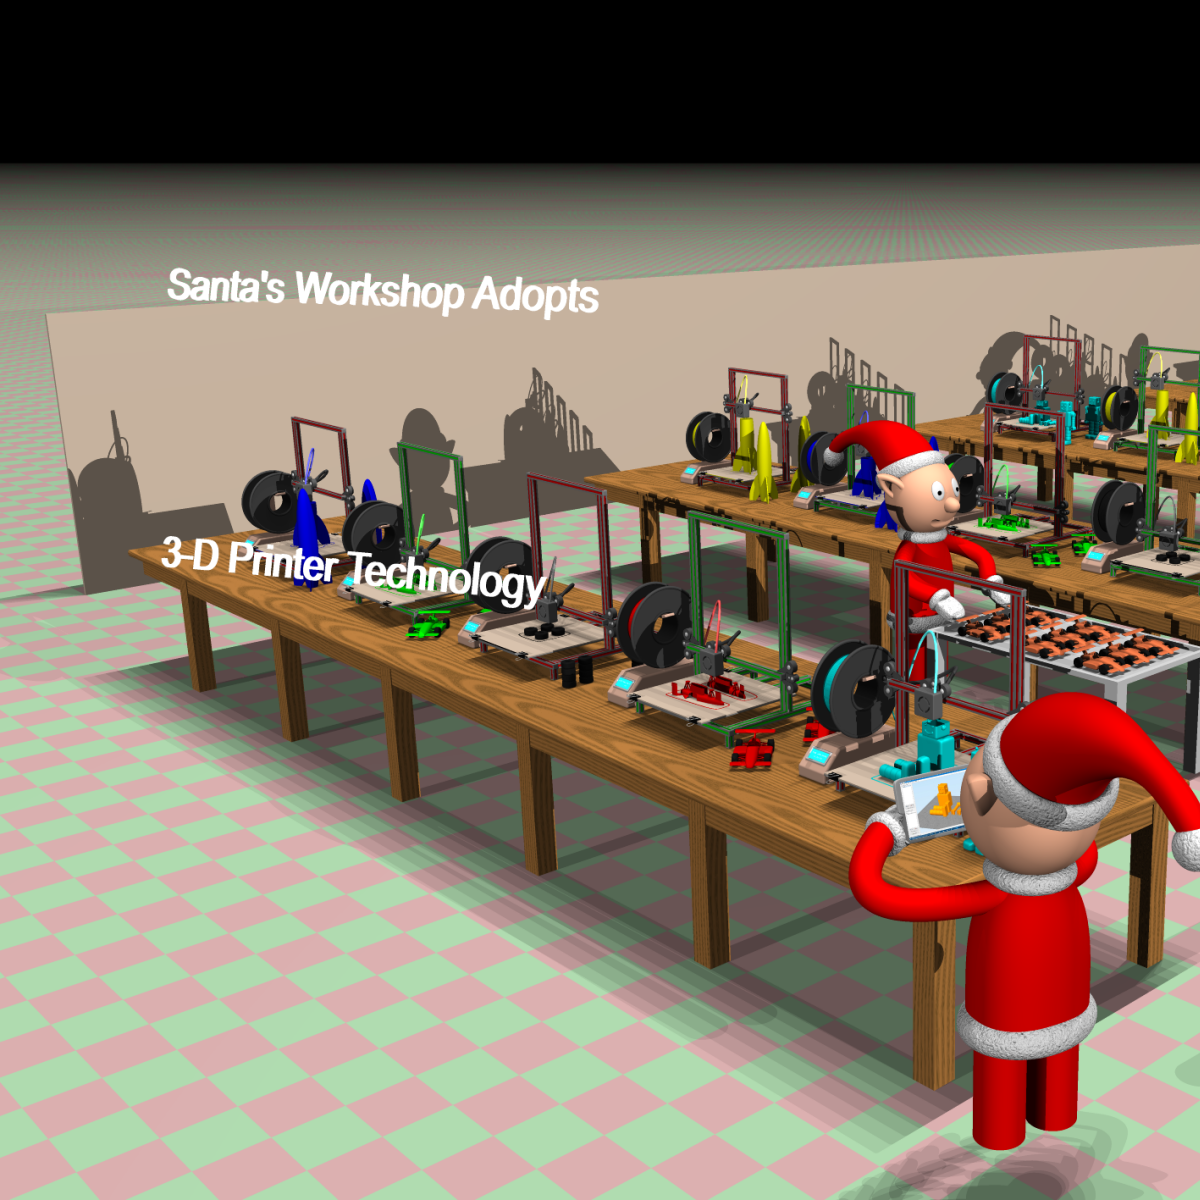
For 2017 I finally came up with an idea for new card. Inspired by my fascination for 3D printing I began to wonder what would happen if Santa Claus adopted this new technology for creating toys. Here is the image that resulted from that concept. Note you can click on any of the images in this blog to see a larger version.

I thought I would describe how I created the image and point out some of the little references that inspired the card.

First of all, this 3D printer is loosely inspired by a printer called the Creality CR-10. It is a very popular relatively new printer with a large build area and can be purchased for under $400 for the standard model and under $500 for the larger version. Here are a couple of views of this printer followed by a close-up of my model.


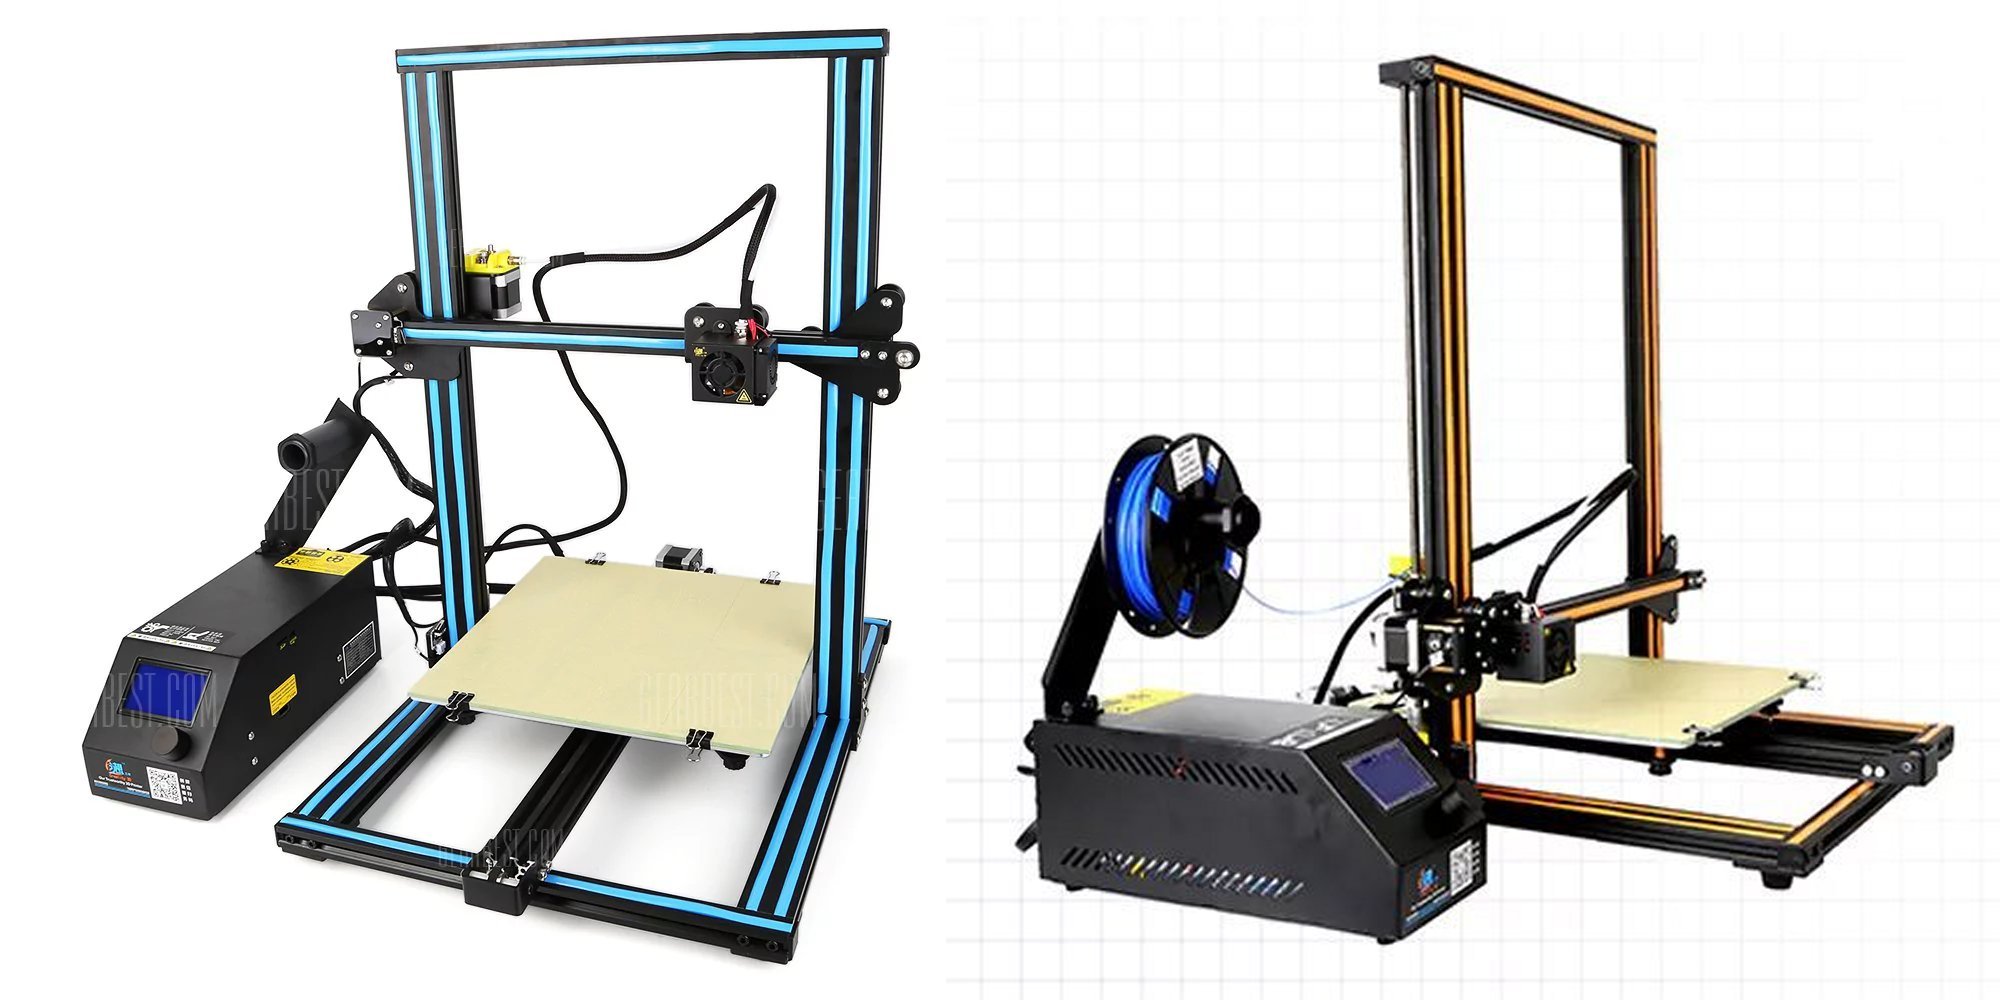
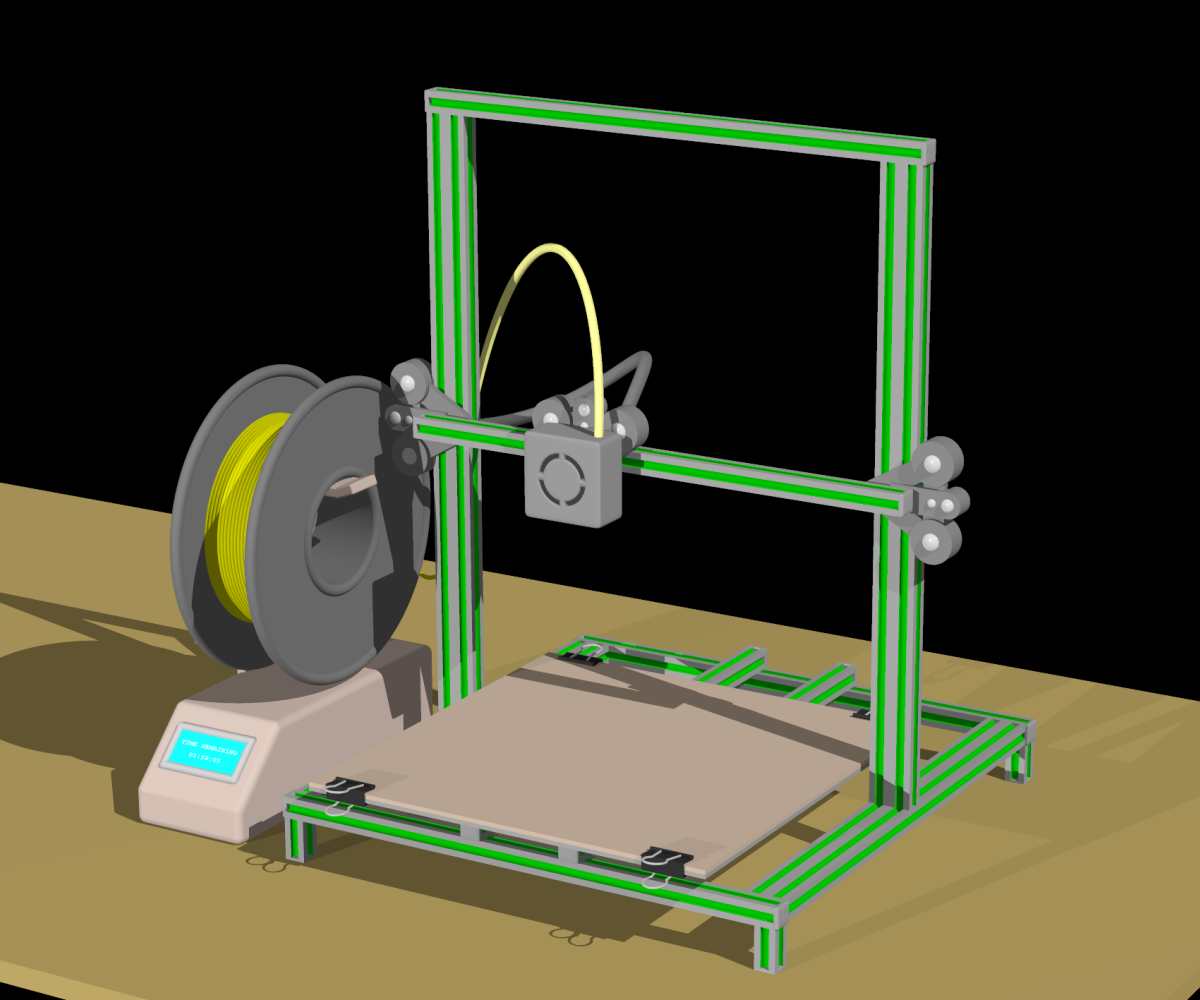
The color trim stripes on these printers are usually either a light blue or yellow/beige color but I decided to give these in more Christmas feel by making them either red or green. When creating such images, you have to decide how much detail you want to create in the model. In the finally mage, even the largest printer in the foreground is only going to be a couple of inches square on the final Christmas card so you don’t really need to put in a lot of detail. For example from some angles that you look at the printer, you don’t see the extruder motor that is on the left side of the cross beam because it is mostly hidden by the upright. So I didn’t bother to model the extruder motor.

The image below is a close-up view of the backside which you never see, none of the threaded rods that elevate the crossbeam and extruder are there. As mentioned before the extruder motor is missing. The piece of plastic filament that runs from the spool to where the extruder motor should be just stops in midair. The Bowden tube that feeds the filament into the nozzle similarly hangs in midair above where the motor should be. In fact there is no extruder nozzle because from the front view it would be hidden by the cooling fan. So I didn’t even bother to model any of the details. If I was ever going to reuse this model for a different scene that would view the printers from different angles then I would have bothered to create the details.

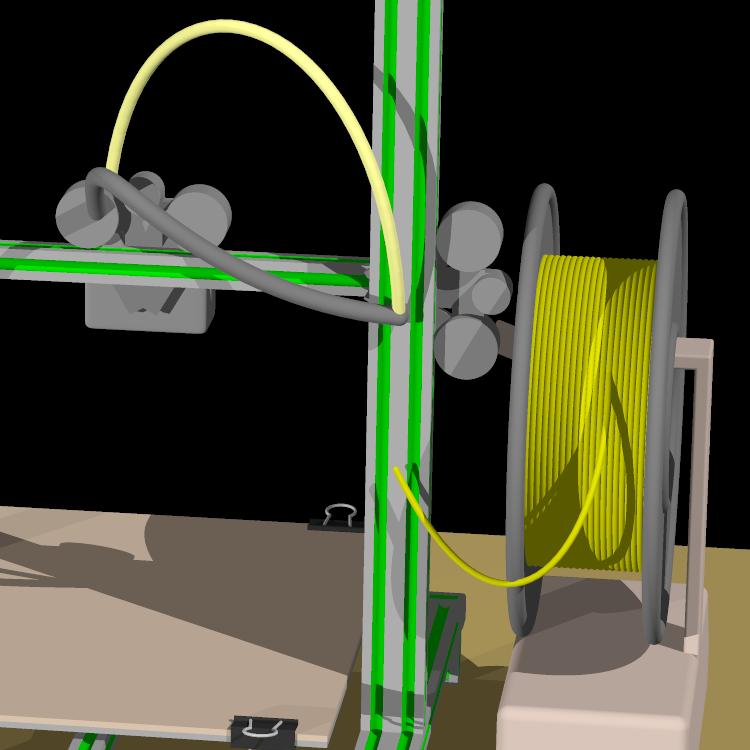
The filament running from the spool to where the extruder motor should be, the Bowden tube, and the cables running to the nozzle and fan were all modeled using Bezier splines. I did that so that I could move the nozzle left or right in the X direction or move the crossbeam up and down in the Z direction on different printers and the filament pieces and cables would continue to lineup properly. That is because the endpoints were attached to the objects. Had I wanted to, I could create an animation moving the nozzle up and down and left and right and all of the filament pieces and cables would have flexed properly.

Sometimes I gave into my urge to go ahead and model some details that may or may not show up in the final image.

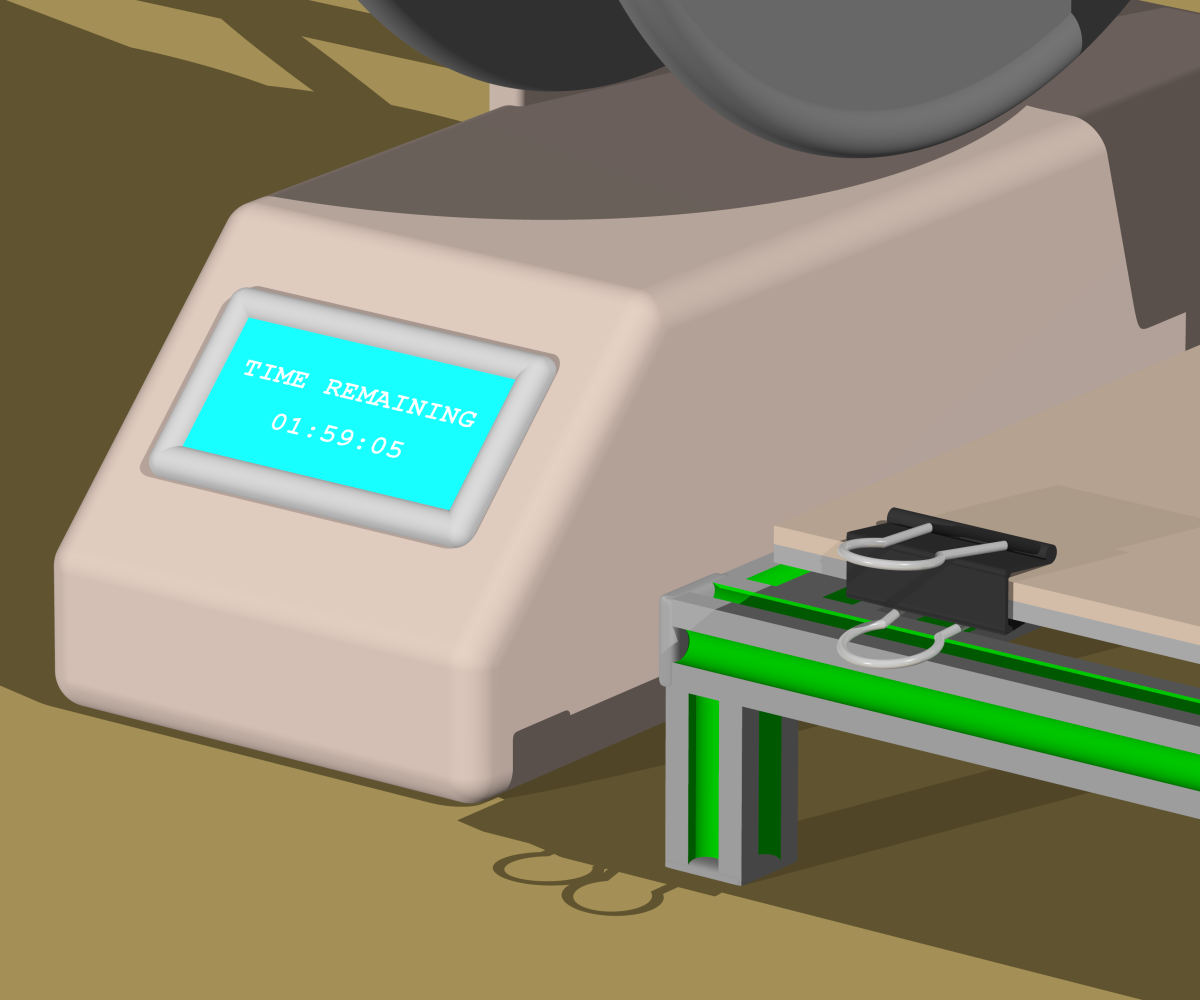
In this close-up you can see that there is an image map in the display window with text telling how much print time is remaining on the current print. Had I been a real fanatic I would have created different image maps for each of the printers because they would naturally have different amounts of time remaining. But I was sure we would not be able to read the text anyway so they all read the same amount. One detail where I put a lot of effort was modeling the little document clips that hold the removable print bed in place. It turns out that in the full image these little clips really stand out and people who are familiar with this technique for securing 3D printer beds will instantly recognize this detail.

Another bit of poetic license that I took in the design of the printer was that the power supply, display, and spool holder are not black like they are in the actual printer. I was concerned that with a dark printer and a lot of clutter in the image, this little box would not show up. So I took the liberty to make it a sort of beige that was supposed to be reminiscent of an old school IBM PC computer case.

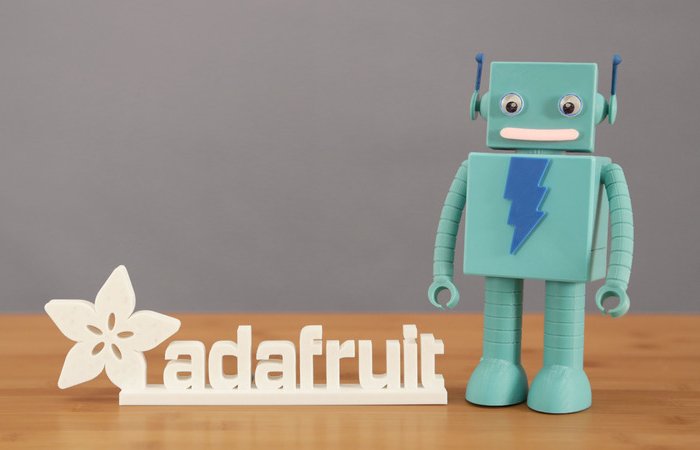
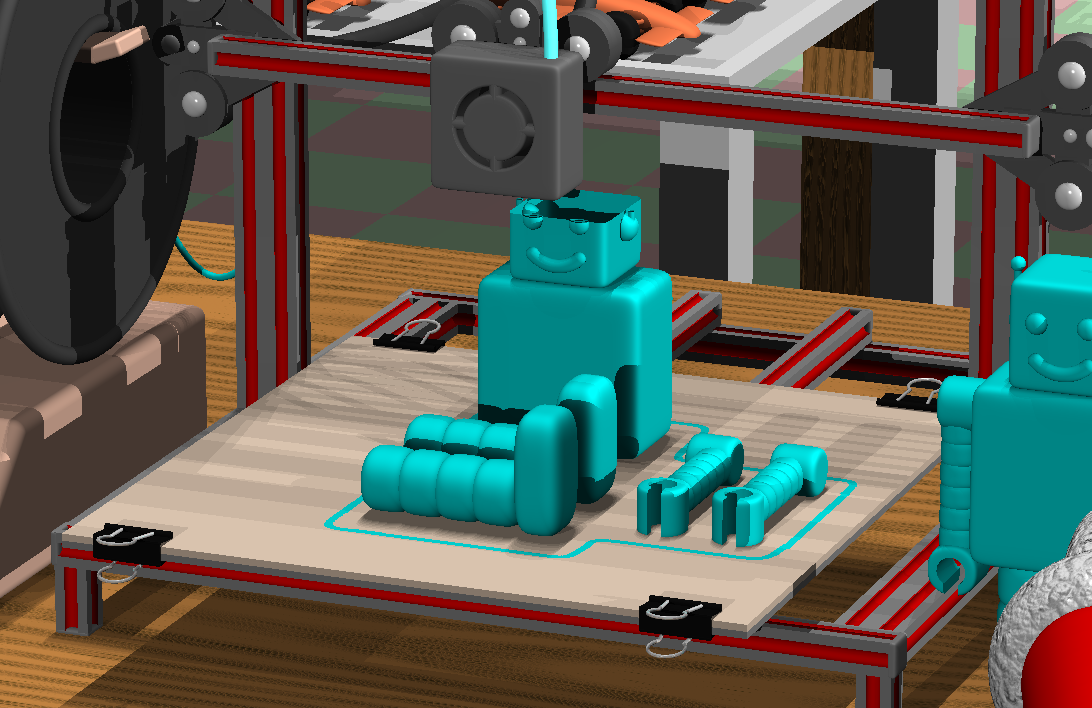
The next job was designing some toys to be printed. The most visible toy is a little robot being printed on the printer in the foreground. It is inspired by “Adabot” — the mascot of Adafruit Industries where I buy all of my electronic parts and maker supplies.

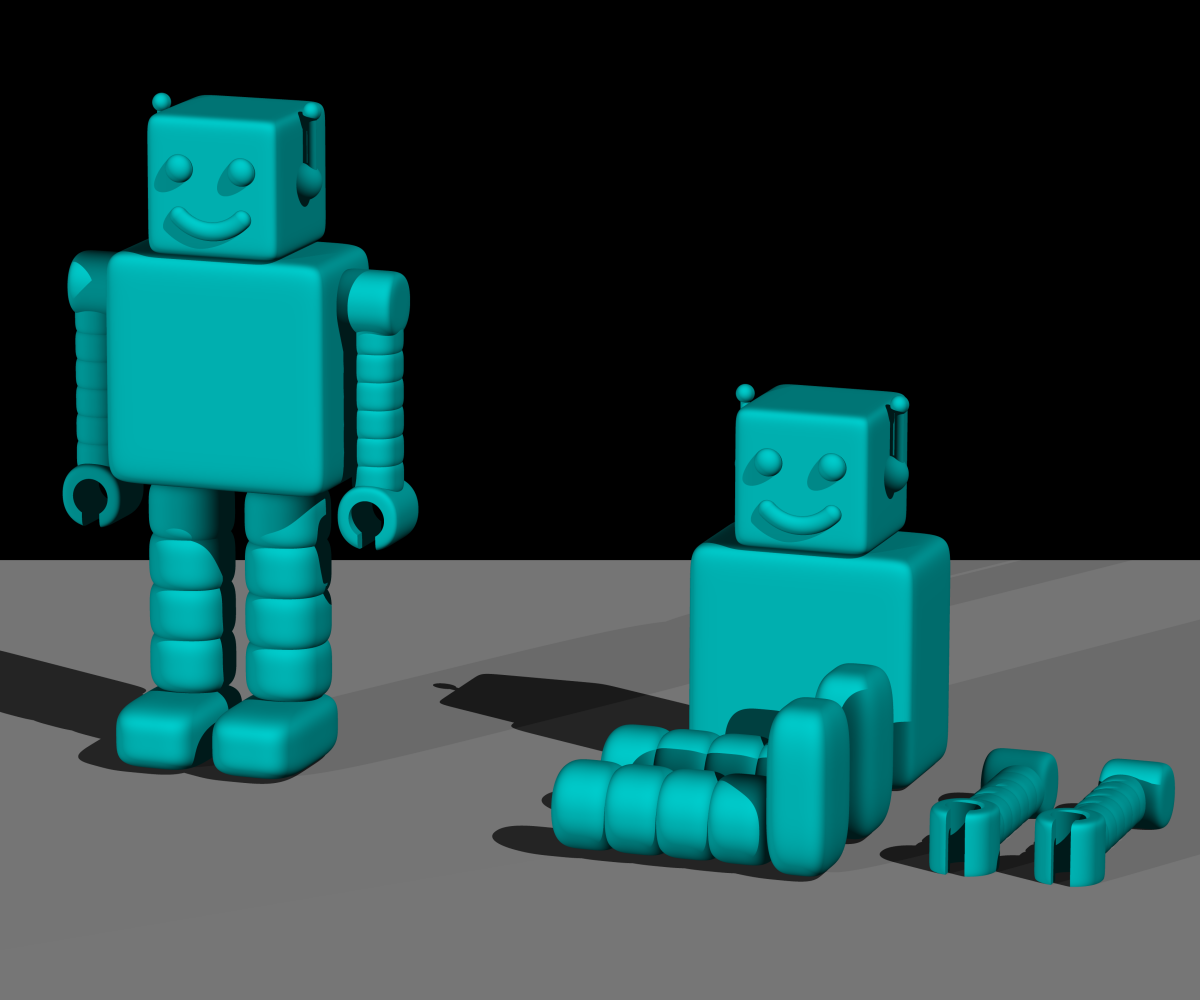
I wanted to have 2 different versions of each toy. One would be a completed version that would sit on the shelf next to the printer and the other would be the parts of the toy as they would sit on the printer platform. A shape like the robot cannot be printed all at once. You could print the body and head together although they would likely be separate. But you would definitely print the knobs and legs separately. Here is a close-up.

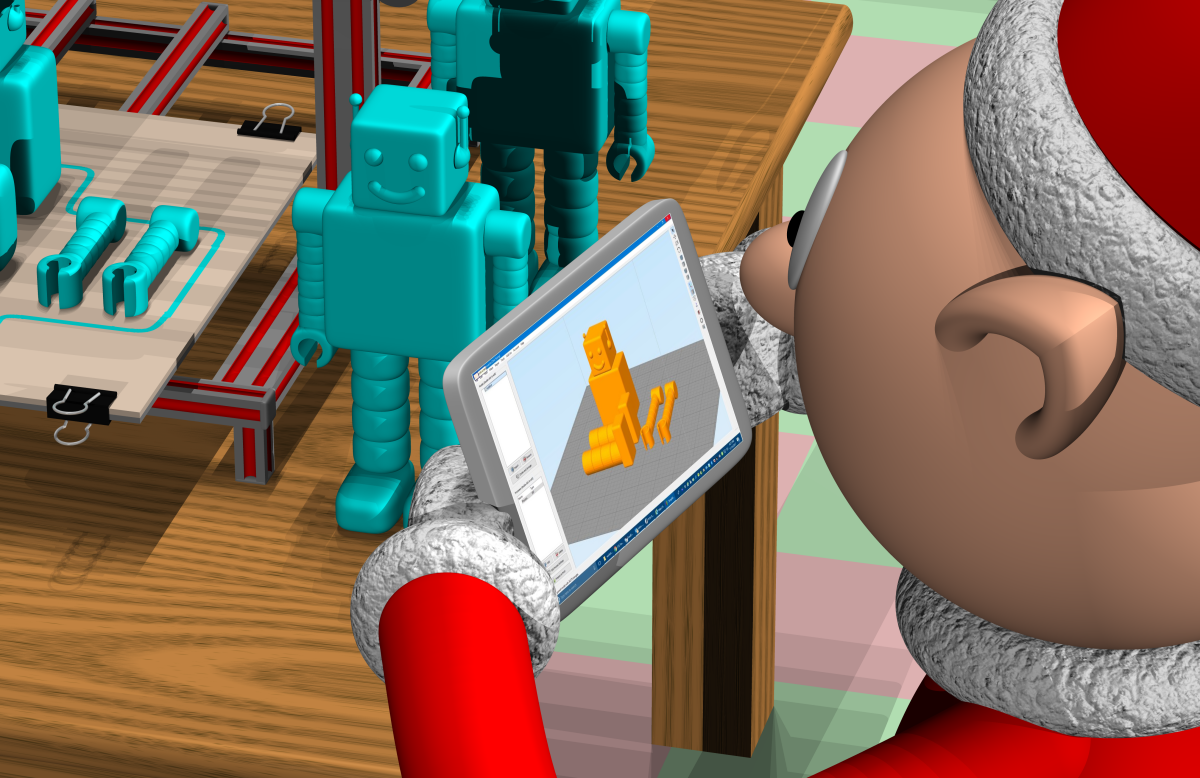
I didn’t put a lot of detail into the robot and he is not an exact duplicate of Adabot but people who are familiar with the character will immediately recognize him. In addition to using the robot as one of the toys, I also wanted to depict a robot being printed on the computer tablet that is being held by the elf in the foreground of the picture. Here is the image map I used on that tablet.

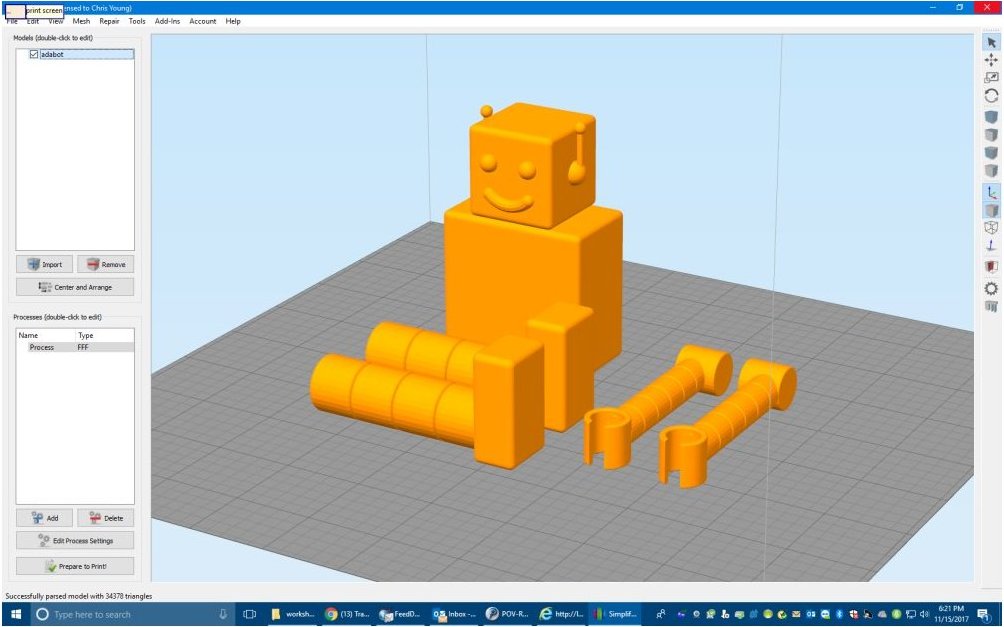
The image above is a screen grab from Simplify 3D which is the program I use to actually 3D print objects. Unfortunately POV-Ray doesn’t export objects in a format that can be 3D printed or can be loaded by Simplify 3D. So I had to use CAD software Blender 3D to create another version of the robot just so that I could load it into Simplify 3D and create that screen grab. It only took me about a half-hour to re-create the robot using a different program because I had all of the dimensions and proportions already figured out in POV-Ray. It was pretty easy to model, export as a STL file, load it into Simplify and do the screen grab. I probably had way too much detail because you can barely see the robot on the tablet. But you can certainly tell that he is looking at a screen representation of what’s being printed in front of him and that was the point. Here’s a close-up that shows more detail than you can see in the original image.

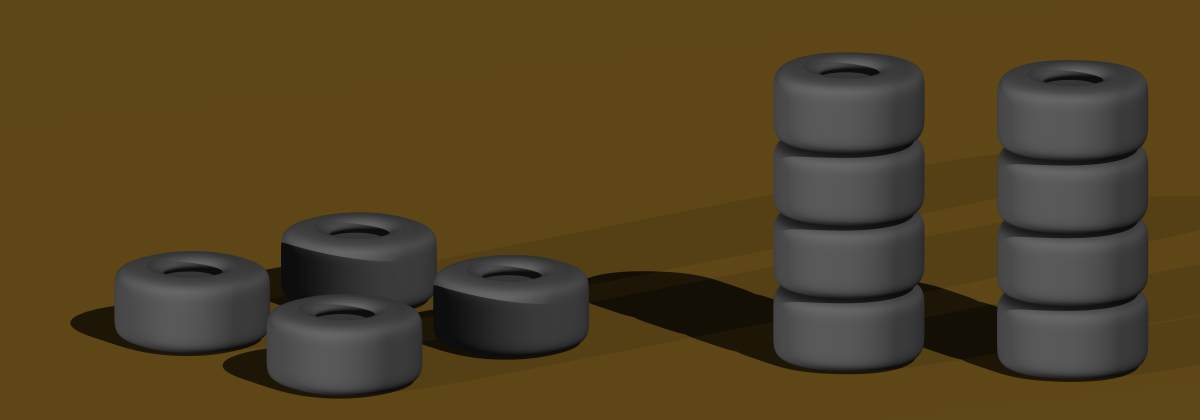
The second toy that I wanted to model was a racecar. I’ve thought about doing a regular stock-car or perhaps it toy truck but it turns out that the racecar was easier to model and being from Indianapolis an IndyCar was a good choice. Again I needed to create two different versions of the model. One of them was a car assembled sitting next to the printer. The other was the car as it would be printed on the 3D printer. I decided the if I was really going to 3D print such a model, the easiest way to do it would be to split it lengthwise down the center and print each half separately. Also the tires would be printed separately. You can see the wheels being printed on a printer in the second row.

After the image was nearly completed I noticed I had made a mistake. The 3D printer doing the racecars was actually printing 2 left sides of the racecar rather than a right and a left. Probably no one would notice but I was glad I caught the mistake in time. I created the model so that it was easy to change the color of the car. In addition to the red car on the printer in the foreground you can see green cars being printed in the background and there is an elf pushing a tray full of assembled orange cars. Here’s a close-up of the IndyCar and of the wheels as they appear on one of the 3D printers in the background.


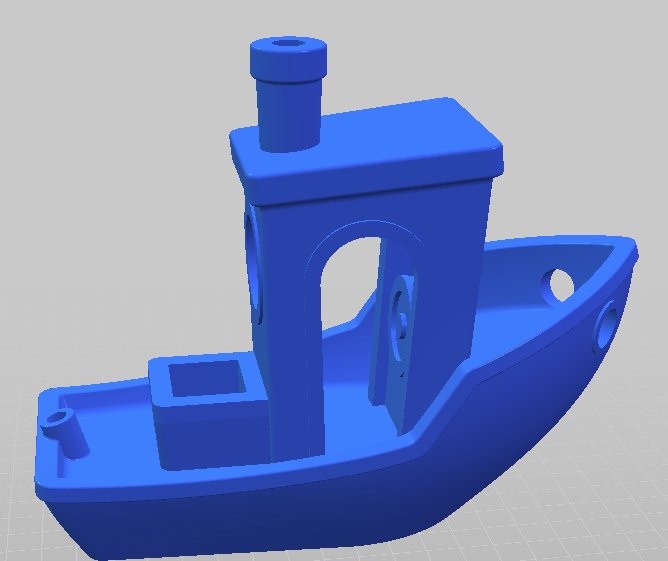
Additionally in the background you can see there are printers creating 2 different colors of a toy rocket. This of course was the simplest of the toys to create. I thought about creating other toys. One I seriously considered was a little toy boat affectionately known as “Benchy”. It is a classic 3D printer model used as a benchmark to judge the print quality of various 3D printers. The problem was it is only available in STL or other CAD formats and it would’ve been difficult to import into POV-Ray. I decided that with different colored racecars and different color rockets and given the fact that you could barely see what was printing on the back rows of printers, it wasn’t worth my time to model additional toys.

One of the nice things about creating computer models for scenes like this is that you can duplicate multiple copies of the printers and toys and place them however you want. I just created a loop that created an entire row printers on a table and then created another loop that created multiple tables with one in each row. Here is a wide-angle elevated view of the entire scene.

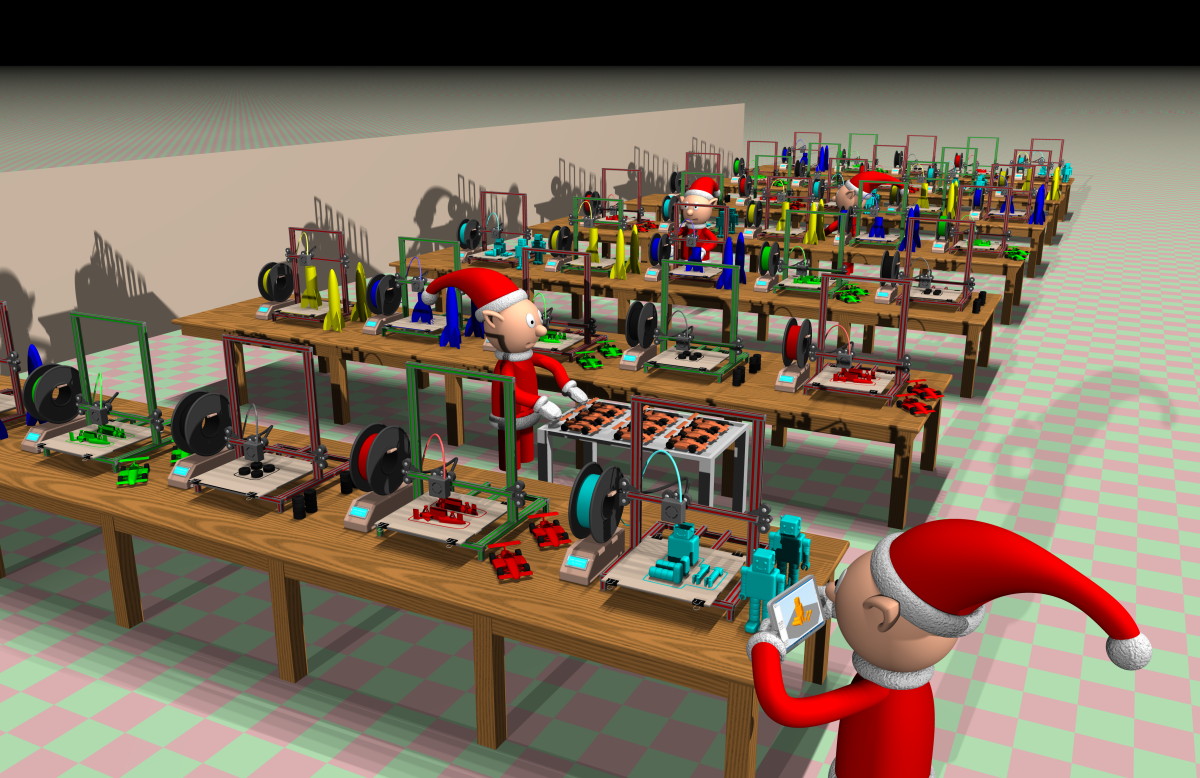
I thought about doing something fancy for the background but the image was already looking sort of “busy” so I just added a blank wall. I was also going to put boxes of supplies and perhaps additional spools of filament underneath the tables but that was going to be a lot of work and as I said the image was perhaps already a bit cluttered. I decided to just put down a red and green tile floor.

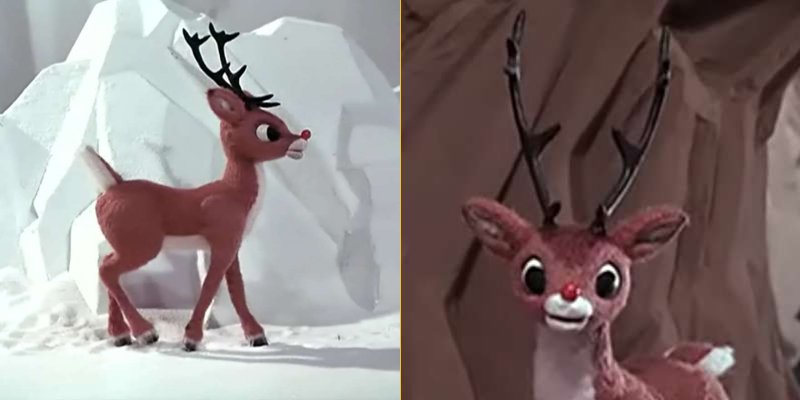
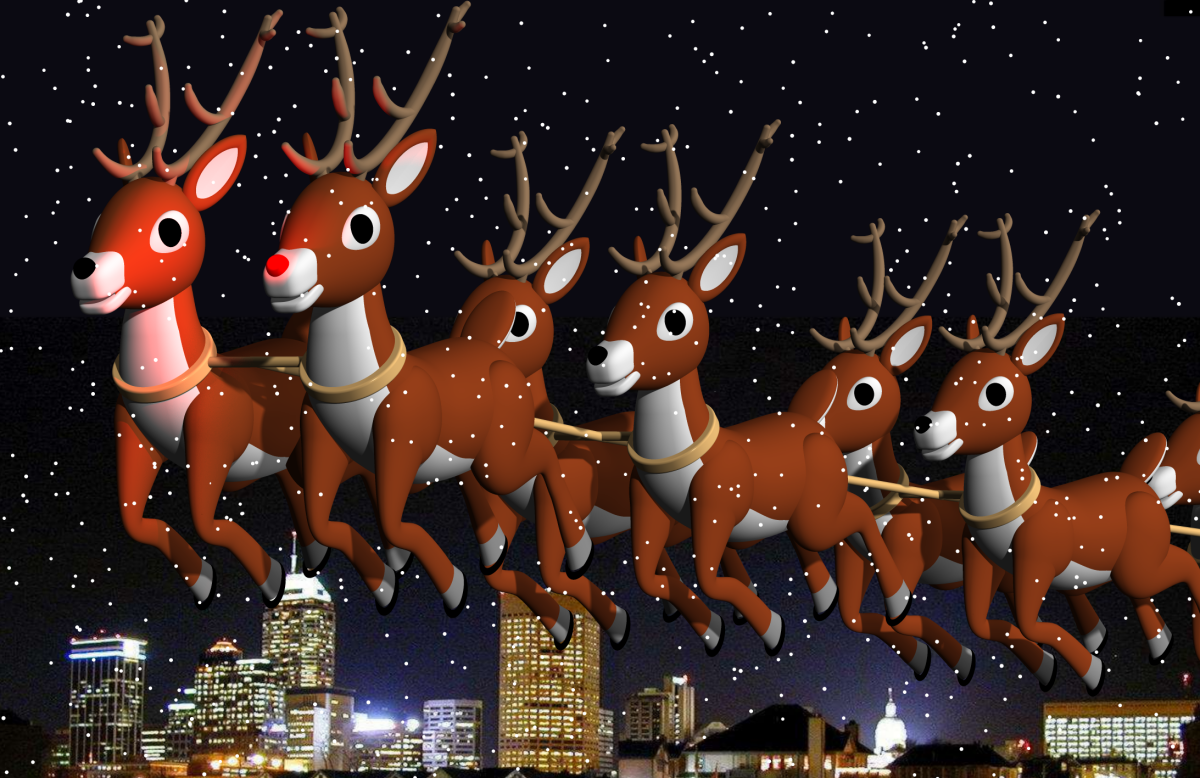
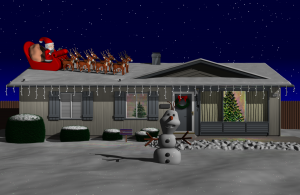
The final piece was of course to design an elf. The design was very loosely inspired by the elves in the animated Christmas special “Rudolph the Red Nosed Reindeer”. I repurposed the hat from a Santa Claus model I had created for my 2011 Christmas card which depicted a dining room table set for Christmas dinner. A little Santa doll was a decoration on the table. That Santa also appeared on the roof of my house in the 2014 Christmas card. Lots of my Christmas card designs reuse different models from year-to-year or adapt previous models for new purposes. But this year everything except the hat on the elves which was redesigned from Santa’s previous hat was completely original for this card. I have not created such a totally original design in a long time. Below is the 2011 card which was the most complex Christmas card I ever created with dozens of elements repurposed from previous cards. Also here is the 2014 card depicting Olaf the snowman in front of my house with Santa on the roof. Don’t forget you can click on the images for larger versions.

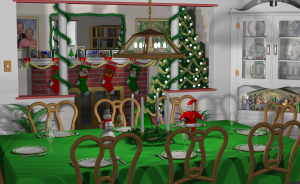
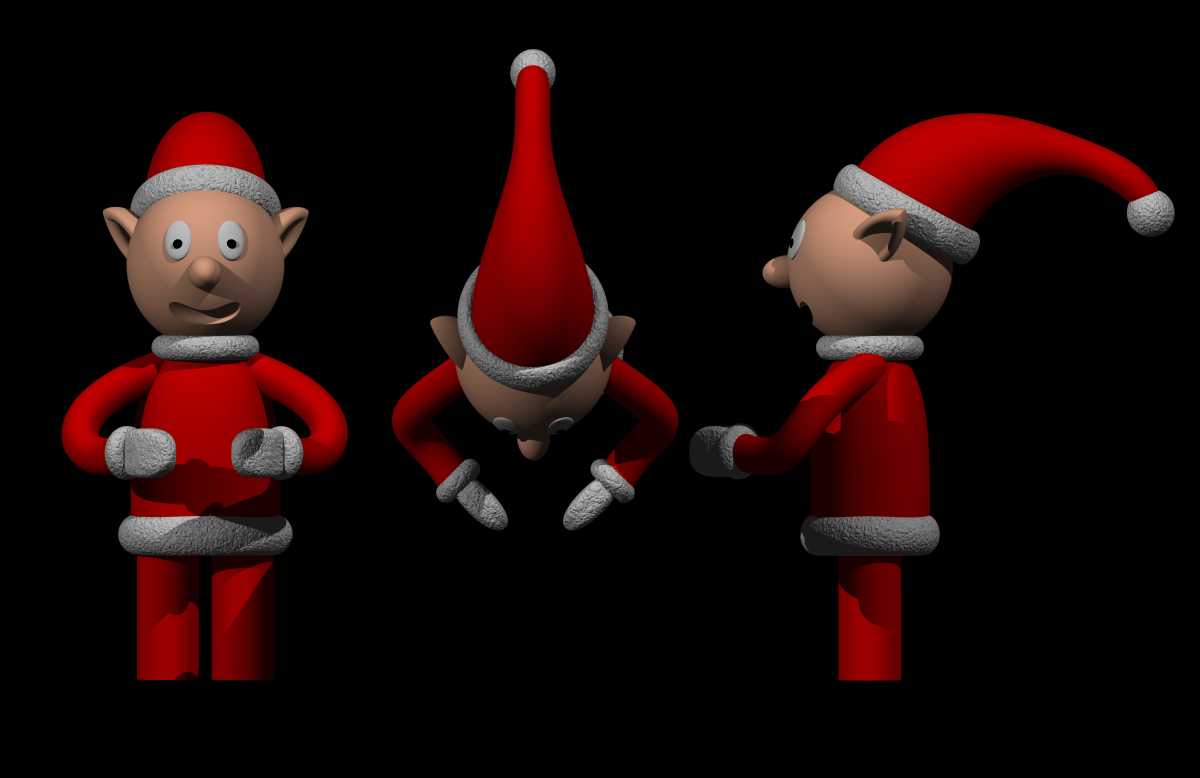
Here is a look at the elf from different angles. I didn’t bother creating feet because they were not going to show in the final image. I used a crinkled normal pattern to make parts of the costume look like they were made from fur when viewed from a distance. The arms were made from Bezier splines so that I could move the hands around in different positions and arms would follow.

There was one final detail that was missing from the image. My guess is no one would have noticed had I left it out. After I took the time to put it in, I was glad I did. When you print something on a 3D printer, the software draws an outline around the object several times so that it ensures that the plastic is flowing smoothly out of the nozzle before the actual print begins.

I started by making a rendering of just the build plate with the toy sitting on it with the camera directly overhead looking down. Then I loaded the image into a paint program and using the mouse, drew an outline around the object. I then erased the toy, adjusted the color palette, and reused that image as an image map on the print bed of each printer. Here is the overview rendering that was the first step of the process.

Here is the same image after I’d drawn the outline by hand.

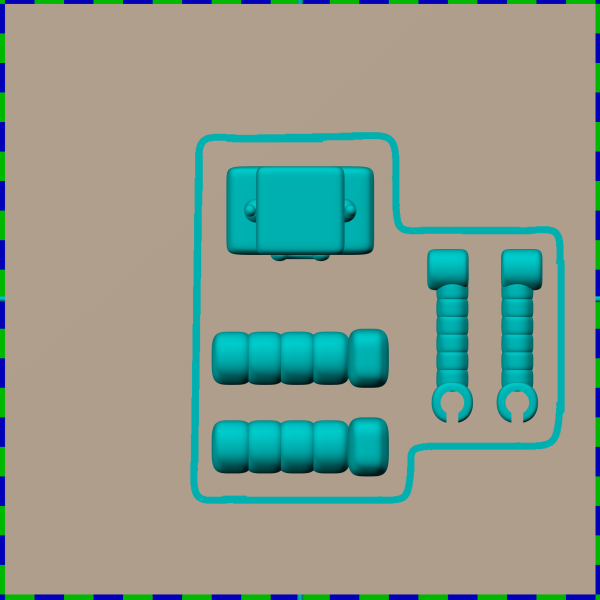
Here is the image map that has the outline but the toy is removed. The color palette has been adjusted.

I had to create a separate image like this for the robot, racecar, wheels, and rocket. I tried to make the one for the robots and racecar reasonably accurate but the other ones were going to be so small in the background that I didn’t do much detail on the outline. You can barely see it in the final image.

Here is a close up of the robot sitting on the printer. You can see the outline on the printer bed. This also shows how I used a clipping plane to chop off the top of the toys to make it look like the print was in progress and not yet complete. On a real model like this, there would be a crisscross pattern or honeycomb like interior on the model but I just decided to leave it hollow.

The final step was to add the text overlay. I considered just using a paint program to overlay the text on the completed image. However I wasn’t sure how that text was going to impact the details of the image. I would’ve had to re-render the image at different zoom factors and camera positions to allow space for the text to show up. During the re-renders and then having to redo the text multiple times was going to be complicated. In the end, I modeled the text in the rendering program so the text is actually an object sitting in the foreground of the image. It takes quite a bit of math to move the text object into position so that is completely perpendicular to the line of sight of the camera. You take the location of the camera, the location the camera is looking at, and then do a bunch of math. It took me nearly a day to figure out and I might’ve been able to do all of the re-rendering and adding of the text as post-processing quicker than figuring out the math. However if I ever need to do this again, I’ve already got the math worked out in advance. So I figured it was worth the effort. Here is a side view of the scene that shows that the text is actually an object floating in midair.

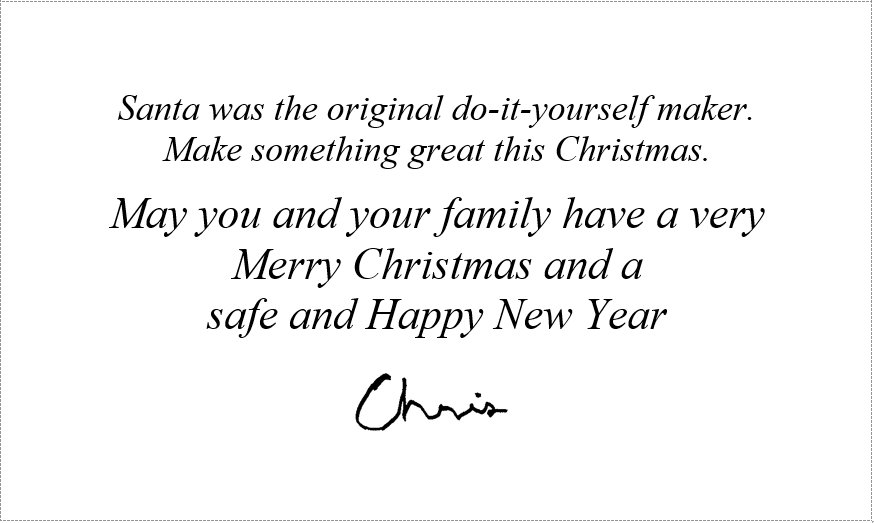
Here is what the interior of the Christmas card looks like.


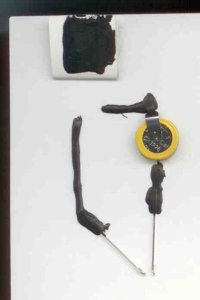
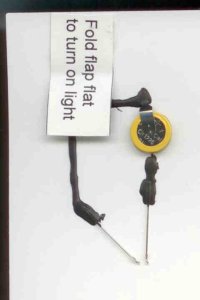
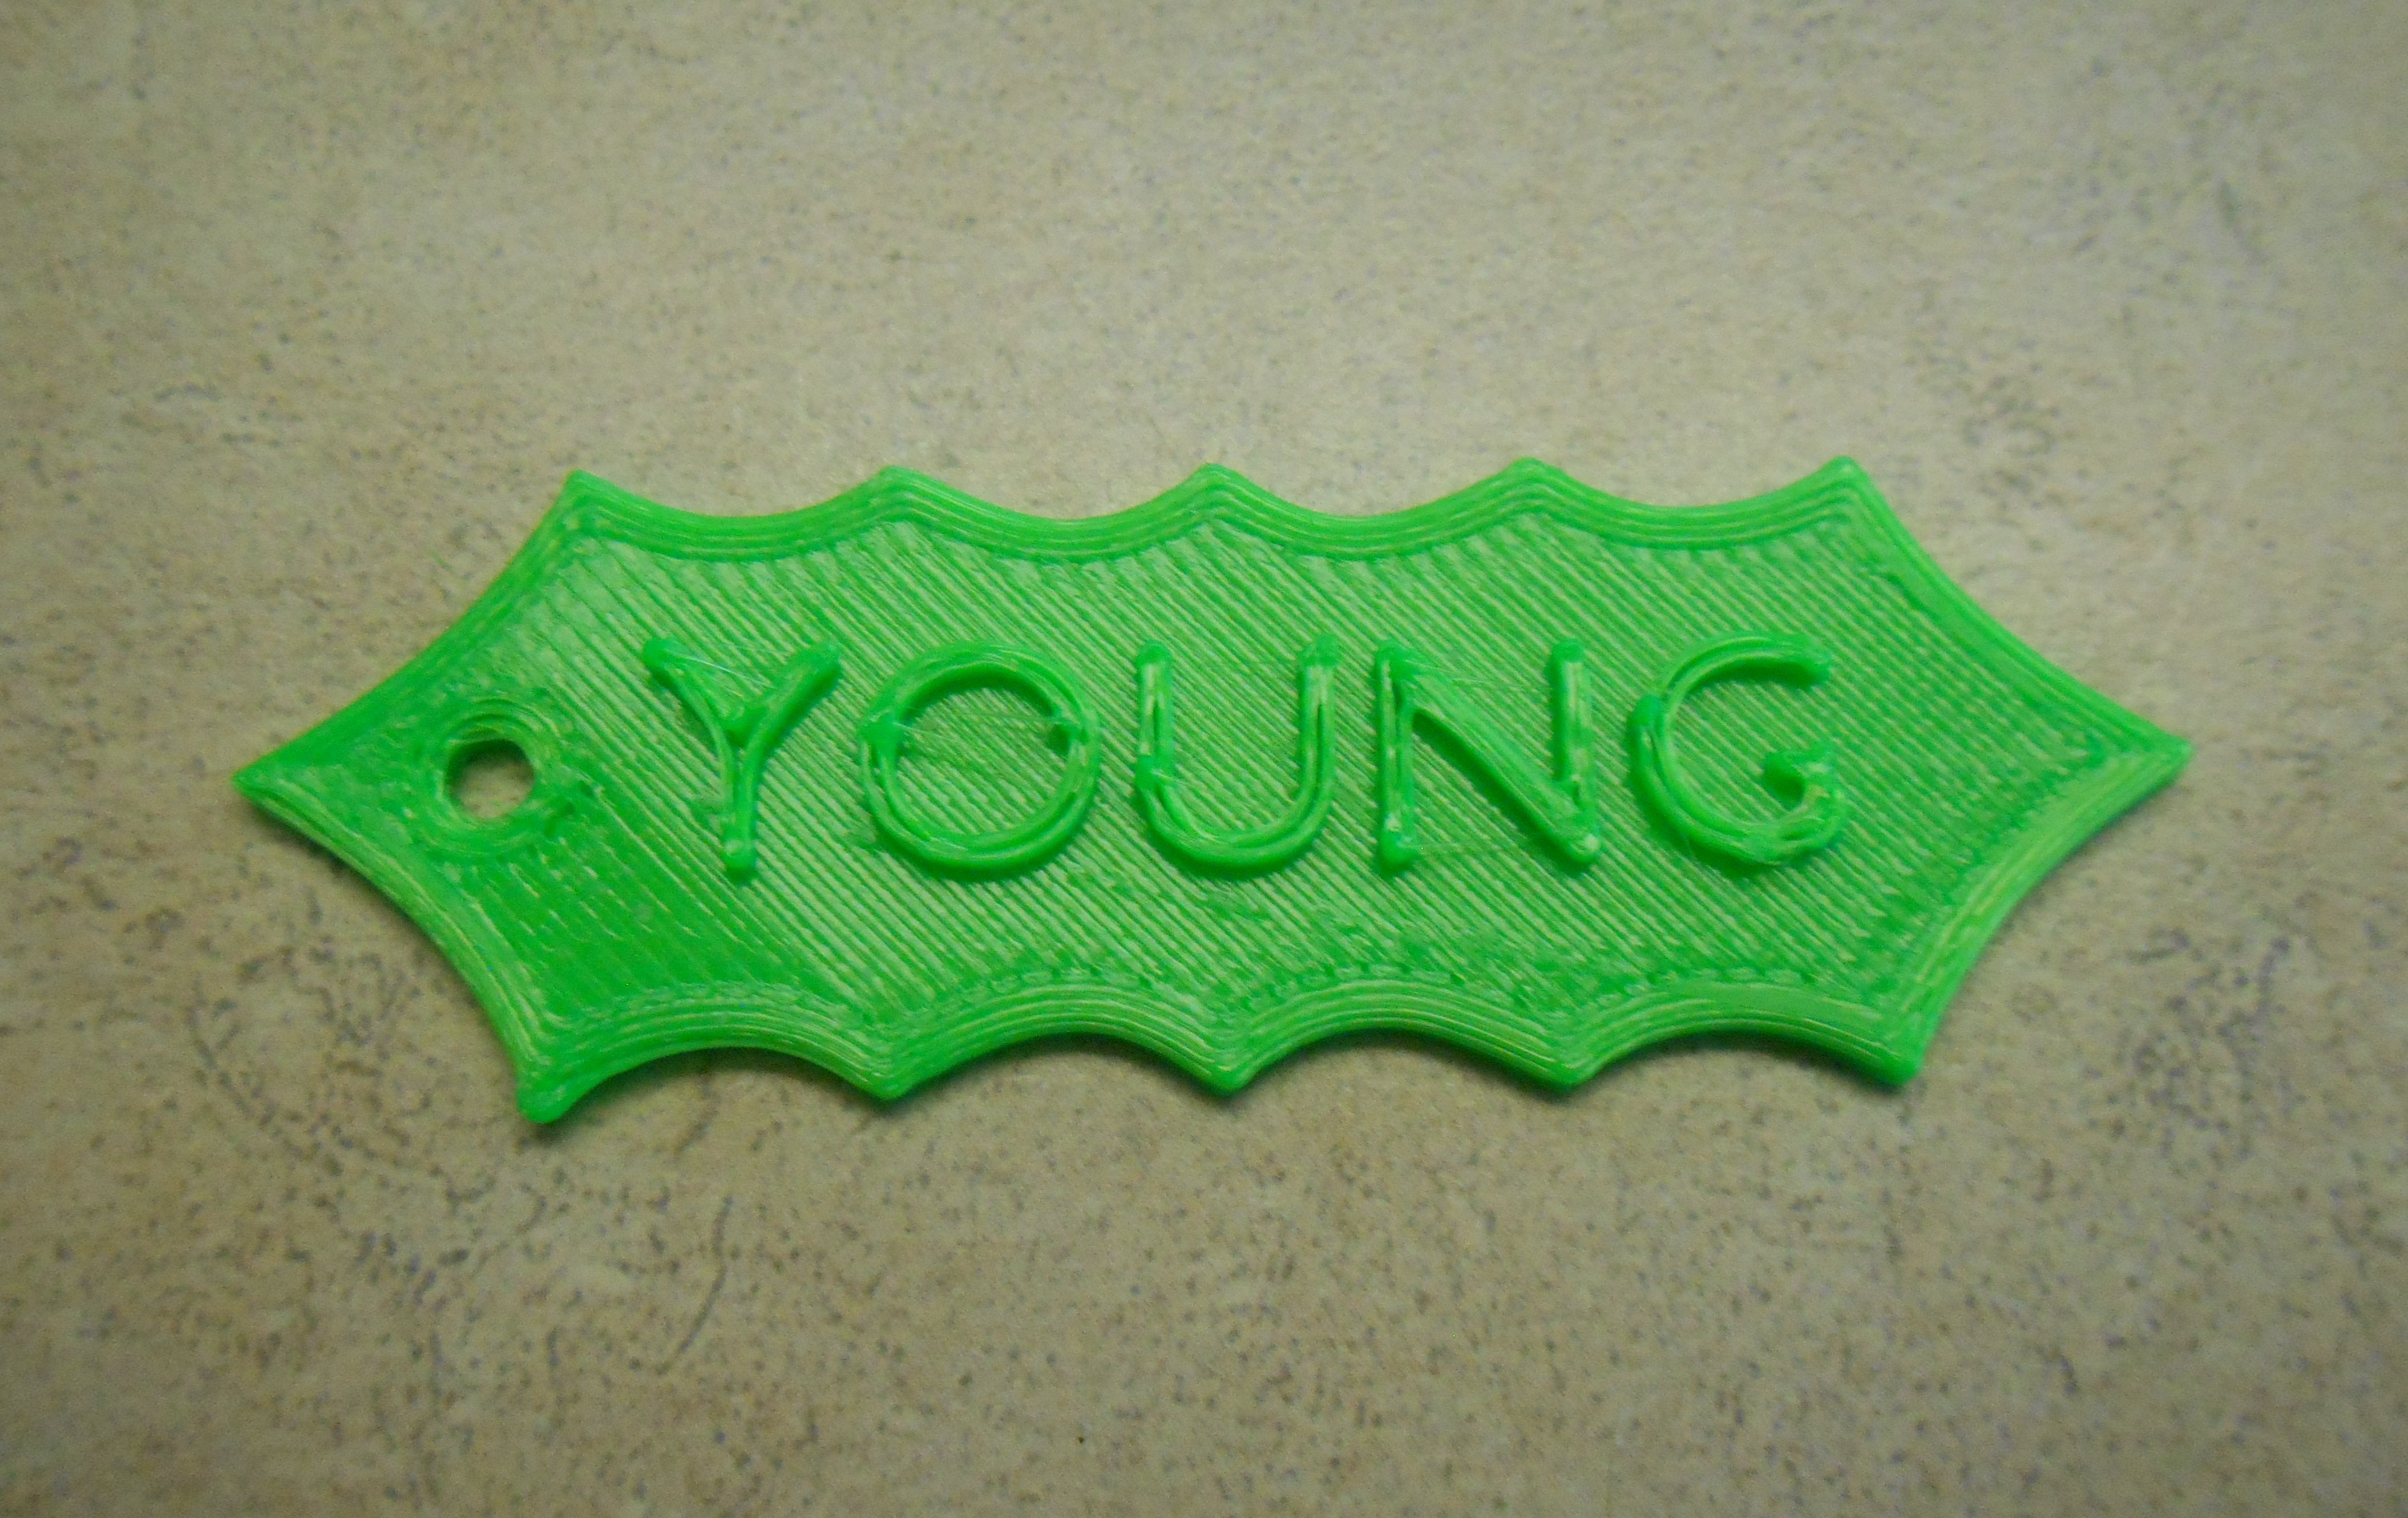
Because some of my friends and family have never seen a 3D printer or know how it works, I decided to put something special in the card of several recipients. I made a little 3D printed Christmas ornament in the shape of a piece of holly. Embossed on the front of the object I put their name. Here is a sample print showing my last name.

Finally here is another blog post on my technology blog with a YouTube video showing how I created the little ornaments.

How I Made 3D Printed Customized Christmas Holly Ornaments

You also find other blog posts about other 3D printed Christmas ornaments that I have created here and here.

I hope you have found this little behind-the-scenes peek at how I create my Christmas card educational and entertaining. Merry Christmas everyone.

Shining Your Light on Christmas: Making a Ray-Traced Christmas Card

Each year it’s a challenge to come up with a new design for my famous ray-traced computer-generated Christmas cards. Sometimes when I run out of ways to outdo myself from a previous years card I come up with a gimmick. For example in 2010 when I had just purchased a new 3-D TV I decided to make a 3-D Christmas card. I rearrange the figurines in an older card that showed a nativity scene and rendered it in 3-D. Each card came with it on set of red/blue anaglyph 3-D glasses for viewing. I also made an animated version where the camera moves in and around the scene. It was a little video clip that I could show on the 3-D TV. Click here for a YouTube version.

This year I was totally stumped on what to do next. I’ve done almost all of the religious themed cards that I could think of. I’ve done Mary and the Child (1997). The Three Kings (1998). Shepherds and Angels (2002). Mary and Joseph and Child (2001). Mary and Joseph and the Innkeeper (2003). I’ve done various Christmas trees some close-up with just a few ornaments (1996). An entire decorated Christmas tree (2006). Then I did a Christmas stocking (2007), a fireplace with multiple stockings (2008). In 2011 I had my most complex card ever been included a Christmas tree, fireplace and stockings, a dining room table with Christmas decorations including a china cabinet in the background full of plates with various patterns on them. Last year I did a close-up of the same table Christmas ornaments hanging in a cone shape that resembled a tree. There just isn’t much else to do.  Here is a link to a Facebook album showing all of my computer-generated Christmas cards.

The only area of Christmas that I haven’t explored is more of a kid’s theme with Santa Claus, reindeer, snowman etc. So I decided that was the road I needed to explore next. However except for a small Santa figure on the dining room table scene, I had not created any objects from this genre. One of the things that makes these cards easier to make your after year is that I can reuse models and reincorporate them year-to-year.

Perhaps it was time for another one of my gimmick cards that reflects what’s going on in my life currently. If I look back over the past year the thing that is occupied my life most is taking up the hobby of electronics. I built multiple gadgets using Arduino-based microcontrollers and I have the little credit card sized computer known as the Raspberry Pi which I’ve been playing with.

pen

There is a company called Bare Conductive that makes electrically conductive ink and paint. They sell little kits where you can make greeting cards that have blinking LEDs and tiny button sized batteries. You connect the LEDs to the batteries using their special electrically conductive paint. They have a card that shows Rudolph the Red Nosed Reindeer with a blinking red nose but it is a horribly stylized design that I thought was really unattractive. In addition to selling kits for single cards, they will also sell you a package of 50 LEDs and 50 batteries along with a paint pen for drawing the lines. So I ordered a tube of paint and the LEDs and batteries and started work on my own version of Rudolph.

battery led50

I needed some reference images to design my reindeer. I decided I wanted him to look like the stop motion animated figures from the 1964 Rankin/Bass produced TV special which is still erring even this year. I got a copy of the TV special and did some screen grabs. In the early part of the show Rudolph is very young and has not yet grown antlers. Halfway through he grows up into sort of a teenaged reindeer. He has a good set of antlers but they are not as full as some of the other reindeer. Here are some of the reference images that I used in designing my model.

Screen grab images from Rudolph TV special use as reference images.

Screen grab images from Rudolph TV special use as reference images.

I wanted more than just Rudolph although I could have put him on the ground in the snow perhaps with Santa and some elves standing around. However one of the nice things about creating these computer models is it’s easy to duplicate them. Once you’ve got one reindeer it’s a snap to make eight or nine. I had so much difficulty modeling the antlers the way I wanted them that I didn’t feel like making a different set of more mature antlers for the other reindeer. (You can click this image  for a larger version  as well as other images  in this blog.

Test rendering of Rudolph

Test rendering of Rudolph

One problem was that the LED is relatively big when you think about sticking it on the nose of a reindeer. If I filled the scene up with too many other things, Rudolph would be too small and his nose would be gigantic. So I had to make the Rudolph character be the primary ature in the scene. I did some test renderings with eight reindeer and Rudolph in the front row. It turned out I really didn’t have room to create a sleigh with Santa and a bunch of toys. So it turns out that the sleigh is sort of off the edge of the screen not visible just implied.

8deer1

Then I had to figure out what to do for a background. I could have just done a plain white background and had them sort of abstract. But I really wanted to create a full scene. It would be easy to create a night sky perhaps with stars or snowflakes but I wanted to give it some perspective so I needed a ground scene. It would’ve taken me weeks to come up with a bunch of tiny houses or buildings covered in snow on the ground extending to some horizon. My friend Rick Ruiz suggested maybe a photo background. I started doing Google image searches for nighttime Indianapolis skyline. I needed something that was recognizably Indianapolis but have lots of sky. I finally found the following image.

night1

Unbeknownst to me, this image was a copyrighted photograph by photographer Rich Bell. I do not recall where I obtained the image but it did not contain any visible copyright notice. I did not bother to check the metadata and after resizing and manipulating the image the metadata was lost. In 2016 my use of the image was the subject of a copyright infringement lawsuit brought against me by Mr. Bell. We eventually settled the dispute and of court for undisclosed terms. The image shown here is a legitimate licensed version of the image. Although I believed that my use of the image constituted “fair use” under copyright law, it would’ve cost me thousands of dollars of legal fees and over 18 months in federal court to see the case through to its ultimate conclusion. There is a public perception that anything on the Internet is fair game but it most certainly is not. Any content creator wishes to aggressively pursue their rights under the law may do so. Let my story serve as a cautionary tale. I will have more to say on the topic in a separate blog post at some point.

I had to extend the sky higher and clip off the bottom of the image that shows the city lights reflected in the canal. Now that I had decided that the reindeer would be in flight over the city rather than standing on the ground I had to remodel their legs to put them into more of a swept back flying position. Also my original design had been flying from left to right but the way the buildings were arranged in the skyline I had to flip the reindeer around so they were flying right to left.

bg2

I still have the problem that the legs of the reindeer were partially blocking the skyline. I had to keep moving the skyline image lower in the scene, adding more black space at the top. One of the problems was that the shorter buildings such as the state capital were disappearing off the bottom of the card. So I took some creative license and did a cut and paste to move the capital dome and some of the other buildings on the lower right up higher in the image. It doesn’t mess up the perspective too bad.

bg3

Here is the final image.

final13

I sent the image off to VistaPrint.com to have them printed and soon the parts arrived from Bare Conductive to add the LEDs. We experimented by connecting an LED to one of the tiny button batteries and we let it sit to see how long it would run. After about three days it was still going but it was very very dim.

I generally try to put some sort of Scripture quote on the inside of the card along with a Christmas greeting. I came up with the theme of letting your light shine on Christmas and immediately thought of The Sermon on the Mount where Jesus says to the believers “You are the light of the world… Let your light shine…” So here’s what it looks like on the inside of the card.

greeting

The examples they show on the Bare website show you how to use a little flap of paper to make a switch. You leave a gap in the circuit and then coat the flap with the conductive paint. As you hold close the flap it completes the circuit and the LED lights up. The nice thing about these LEDs is that they don’t require any other circuitry or resistors. They just blink on their own. Here are some images of my circuit.

Paper Flap Switch Open

Paper Flap Switch Open

Paper Flap Switch Closed

Paper Flap Switch Closed

One of the big problems all along in this project was deciding how I was going to mail them. Almost half of them would got people that I see on a regular basis and so I could just hand-deliver them. But many of them are out of town or are people who I don’t see very often in town and would need to mail them. I asked a photographer friend if he knew where I could get boxes that were the size of a 4 x 6 photo since that was the size of the greeting cards. He told me that everything is digital these days and photographers mostly just give the client a Photo CD other images and perhaps a few big prints. One company that made boxes for photos had gone out of business.

DVD mailer from Staples

DVD mailer from Staples


After doing some Google searches I realize that boxes made for mailing DVDs would be just about right. I’m not talking about flat envelopes were padded envelopes. These were boxes for mailing a boxed DVD. The post office has some that are just the right size and you can get them for free but you have to mail them using priority mail. That was likely to be more expensive. I finally found almost the same thing at Staples.com at a reasonable price and so I ordered them. Later that same day I got a phone call saying that they were out of stock and I could reorder in a few days. They did not offer to put them on backorder for me.

uspsI went ahead and ordered the priority mail boxes from the post office. Then I started figuring out the price. If I could go regular first-class I could mail a 2 ounce box for a little over two dollars. But if I was going to mail priority mail it was going to cost me five dollars each! I suppose I could have taped over the “Priority Mail” logos all over the boxes and disguised them but that was probably a federal offense.

I tried looking at Office Depot and Office Max and they had something similar but they would only sell them in packages of 50 and they cost $30-$33. Out of the 30 or so LED cards I was making, I had narrowed it down to only 13 or 14 bit to be mailed. By the time I had paid a high price for 50 boxes, the cost per card was back up to the point where it was similar to the free boxes and the priority mail postage costs. I tried reordering at Staples a few days later we got the website said “in stock”. Unfortunately two days later I got an email saying “sorry they are out of stock”. So we are going ahead with the priority mail postage.

I generally send about 65 or 70 Christmas cards each year. Because I was worried that we were going to ruin some, I went ahead and ordered 100 cards even though I could’ve ordered 75. It was a good thing because we did run a couple of cards and I always come up with some people I want to send to at the last minute.

Because dad was going to be the one to have to assemble all these LEDs and batteries and little paper flap switches and because I didn’t want the costs to get too big, I picked out about 30 people who are family and my closest friends to get the special edition. The other 30 people will get a plain Rudolph Christmas card without the LED. (Shhhh… don’t tell them).

We also ruined a couple of cards because after we had them assembled we discovered that my package of 50 red LEDs actually contained five or six green LEDs! When these LEDs are not illuminated they look completely clear so you can’t tell what kind they are. Somebody messed up at the factory. They are going to get an email from me.

Here is a video of what the card looks like with Rudolph’s nose blinking.

Many thanks to my dad who assembled all of these cards, assembled the boxes for mailing, stuck on the mailing labels, and hauled that all off to the post office.

satb100I had to show off my card so I couple weeks ago I participated in the weekly Adafruit Show-and-Tell video chat on Google plus. Here is a link to that video in which I also showed off some computer-controlled Christmas lights. My segment of this 22 minute video started about the four-minute mark. But the other projects shown that night were really cool as well.

Now what the hell am I going to do next year??? I guess I will have to add sleigh, Santa, and some toys and skip the LEDs.

My First Ray Traced Computer Graphic Christmas Card 1995

All these blog entries up till now have been leading up to my first real computer-generated Christmas card. This was the cover image on the card.

My 1995 Christmas Card Image

The card was printed on ordinary 8.5″ x 11″ paper one quarter size with a quarter inch margin. The page was then folded twice to make a 4.25″ x 5.5″ card. On the inside was the following message.

“Can it indeed be that
God dwells among men
on Earth?”

1 Kings 6:27

“And the Word became flesh
and made his dwelling
among us”

John 1:14

Merry Christmas and Happy New Year

This would be followed by my signature. I actually signed my name one time on a piece of paper, scanned it and turned it into an image which I cut and paste into Microsoft Word every Christmas card since then. So if you get a Christmas card from me in 2013 my signature will look exactly like it did in 1995 because it’s the same image.

The word “Emmanuel” is Hebrew for “God with us”.

While this image looks like a couple of angels in the foreground, the Star of Bethlehem high in the background, and Bethlehem itself on a distant horizon. It is in fact a clever bit of forced perspective. When creating models for ray tracing sometimes it’s important to model the objects at a particular size in order to get the proper lighting effects and texture effects. I also wanted to get the idea that the scene was being backlit by the Star. However with a bright light source in the distance casting shadows forward, the angels themselves were too dark. When I tried shining a light on the front, it illuminated the ground and the Town of Bethlehem too much. I actually ended up creating four spotlights with two each shining on the angels to illuminate them. But there’s more at work here. The “Little town of Bethlehem” is much littler than you think. It is actually a small model sitting in the foreground. Also the Star looks like it is distant with lens flare rays appearing in front of the other objects. In fact Star and the rays are a physical object in the foreground between the Bethlehem model and the angels. In the image below I’ve moved the camera back and up at a different angle to show you what the model really looks like. Sometimes when you’re trying to compose a good-looking image, you just have to fudge it.

The secrets behind the forced perspective in this image.

The secrets behind the forced perspective in this image.

We’ve not seen the last of St. Gabriel Angels. It will show up again in the 1996 Christmas card as a Christmas tree ornament. Stay tuned…

My First “Computer-Generated” Christmas Card (circa 1976)

Starting in 1995 I begin making Christmas cards using the Persistence of Vision Ray Tracer (POV-Ray) open-source freeware software which I helped create. Using a script of text commands it generates photorealistic three-dimensional images with realistic lighting, shading, shadows and other image effects. I’m going to use this blog to share some of my creations throughout the years however before I start off with the 1995 card, I thought it was important to share with you my very first “computer-generated” Christmas card.

It consisted of some ASCII art spelling out the words “Merry Christmas” followed by a cheesy bit of verse that I composed. The entire thing was printed out on green bar computer pape line printer of the DEC-System-10 computer at IUPUI when I was a computer science student there. An image of the card is shown below but in case you can’t read it, following that is the verse that I wrote (questionably bad punctuation included).

My First “Computer-Generated” Christmas Card

MAY YOUR BIAS VOLTAGE BE EQUALIZED,
AND ALL OF YOUR DIODES GLOW.
MAY ALL YOUR CAPACITORS KEEP THEIR CHARGES,
AND NONE OF YOUR FUSES BLOW.

MAY YOUR PARITY ERRORS BE VERY RARE,
AND YOUR DOWNTIME BE QUITE SHORT.
MAKE YOUR REGISTERS NEVER OVERFLOW,
AND NONE OF YOUR PROGRAMS ABORT.

MAY CHRISTMAS BE AS HAPPY FOR YOU
AS IT WILL BE FOR ME.
THE REASON MINE WILL BE SO NICE
IS I'M PRINTING THIS GREETING FOR FREE.

NOW IF YOU THINK MY CHRISTMAS VERSE
SHOULD BE WITTIER AND CUTER
I HAVE TO SAY "THAT'S NOT MY JOB!
GO BLAME IT ON THE COMPUTER."

     IN OTHER WORDS, A VERY MERRY CHRISTMAS AND
      THE HAPPIEST OF NEW YEARS FROM –-

          CHRIS YOUNG
          AND THE IUPUI DECSYSTEM-10

Here are some of the obscure references behind the text.

“Bias voltage” is something that tape recorders use to eliminate background hiss and noise. Rather than having the electricity go plus or minus a couple of volts say from +2v to -2v the recording head adds a bias so that perhaps it goes from +5v to +1v. I don’t know if these values are even in the ballpark of what’s actually used I’m just explaining the principle. In the mid-1970s cassette tapes came in different varieties. The ordinary tapes used “normal bias” and the newfangled metal oxide tapes use something called “high bias”. When you play back the tape, in order to get the best results your playback had to equalize the bias voltage properly. There was little switch you had to throw between high bias and normal bias. I still don’t understand completely what it means but it sounded cool so I included it.

“Diodes glow” in the mid-70s light emitting diodes were relatively new technology.

Capacitors and fuses are pretty straightforward. No explanation needed.

“Parity errors” when computers transmit data over a serial line they generally transmit eight bits at a time but in order to detect mistakes they transfer a ninth bit called a “parity bit”. Parity can be “odd” or “even”. That means in the string of 1s and 0s you add up the number of 1s and see whether you get an odd or even number. If you’re expecting odd and you get even that’s called a parity error. That’s bad news. You want them to be “very rare”.

“Register overflow” computers do arithmetic in special storage places called “registers”. But registers can only store a number with so many digits (or bits). If you try to do arithmetic with two big of a number you get a register overflow error. That’s bad.

“Programs abort” anytime a program stops unexpectedly is called an aborted program. (Bad joke from the archives… I’ve got one of those new “RU-486” CPUs and it’s causing my programs to abort.) ((Explanation of the explanation… Intel made a processor called a 486. However RU-486 was the name of an early “morning after” abortion pill.))

“Free printing” if I had typed up the text and taken it to the library and xeroxed it it would have cost me 10 cents per page. But if I typed it into the computer and told them to print me 30 copies of it, it was free. I had a psychology professor who had discovered this and rather than type up his class notes or handouts and xerox them, he would just put them on the computer. They would print as many copies as he needed to distribute to his students for free. It seemed strange to get class notes from a liberal arts teacher on green bar computer paper but it was pretty smart of him. It inspired me to print these cards that way.

“That’s not my job!” There was a popular TV show called “Chico and the Man” starring the late Freddie Prinze Sr. He was a bright and rising young Chicano standup comic who at the age of about 19 got his own sitcom. He played Chico who worked in an auto repair shop run by cranky old man played by the late great Jack Albertson. Although he talked in plain English most of the time, whenever “the man” would tell “Chico” to do something he didn’t want to do he would throw on a very thick Hispanic accent and say “ezz no my chob mhan”. (It’s not my job). That phrase got to be a pop-culture catchphrase. Tragically Freddie Prinze committed suicide at age 22. He was the father of TV and film star Freddie Prinze Jr.

“Blame it on the computer” is to this day a pop-culture catchphrase.