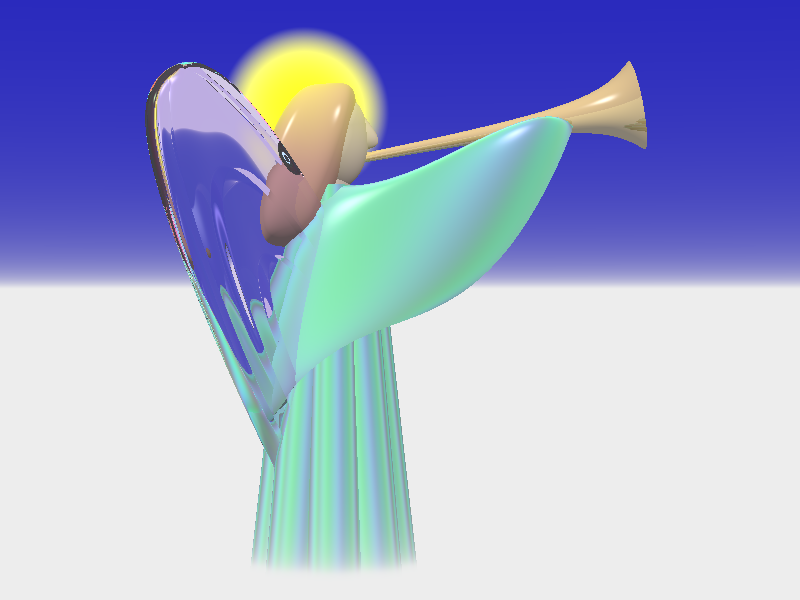
The above image is a rendering of St. Gabriel the Archangel that I created sometime in 1995 using the Persistence of Vision Ray Tracer or POV-Ray. It is loosely based on the logo for St. Gabriel Church in Indianapolis where I attend. Click here to see a YouTube video that explains how I designed it. The angel has appeared in many Christmas cards that I’ve designed including the first card I designed in 1995 which you can read about here. The style of the angel became the basis for a number of other figures in other Christmas cards that I’ve created over the years.
I’ve always wondered what this angel would look like in real life. With its shiny somewhat iridescent surface I’ve always envisioned it as if it was made out of glass or fired ceramic. Not having any skill in that field my desire to see it realized it had to be put on hold for decades. However a little over a year ago I purchased a 3-D printer and I finally found a way to create a printed version of the angel. The halo is rendered as a sort of gaseous blob floating around the head so there’s no way I can re-create that but the rest of the figure can be 3-D printing.
The biggest technical problem is that POV-Ray does not export its designs in a format that can be used by 3-D printers. I eventually found a way to get POV-Ray to scan the shapes and create a set of points in 3-D space referred to as a “point cloud”. I then use that exported data in the program called Mesh Lab that will turn this set of points into a mesh of triangles that can be imported into other CAD design software and eventually be 3-D printed.
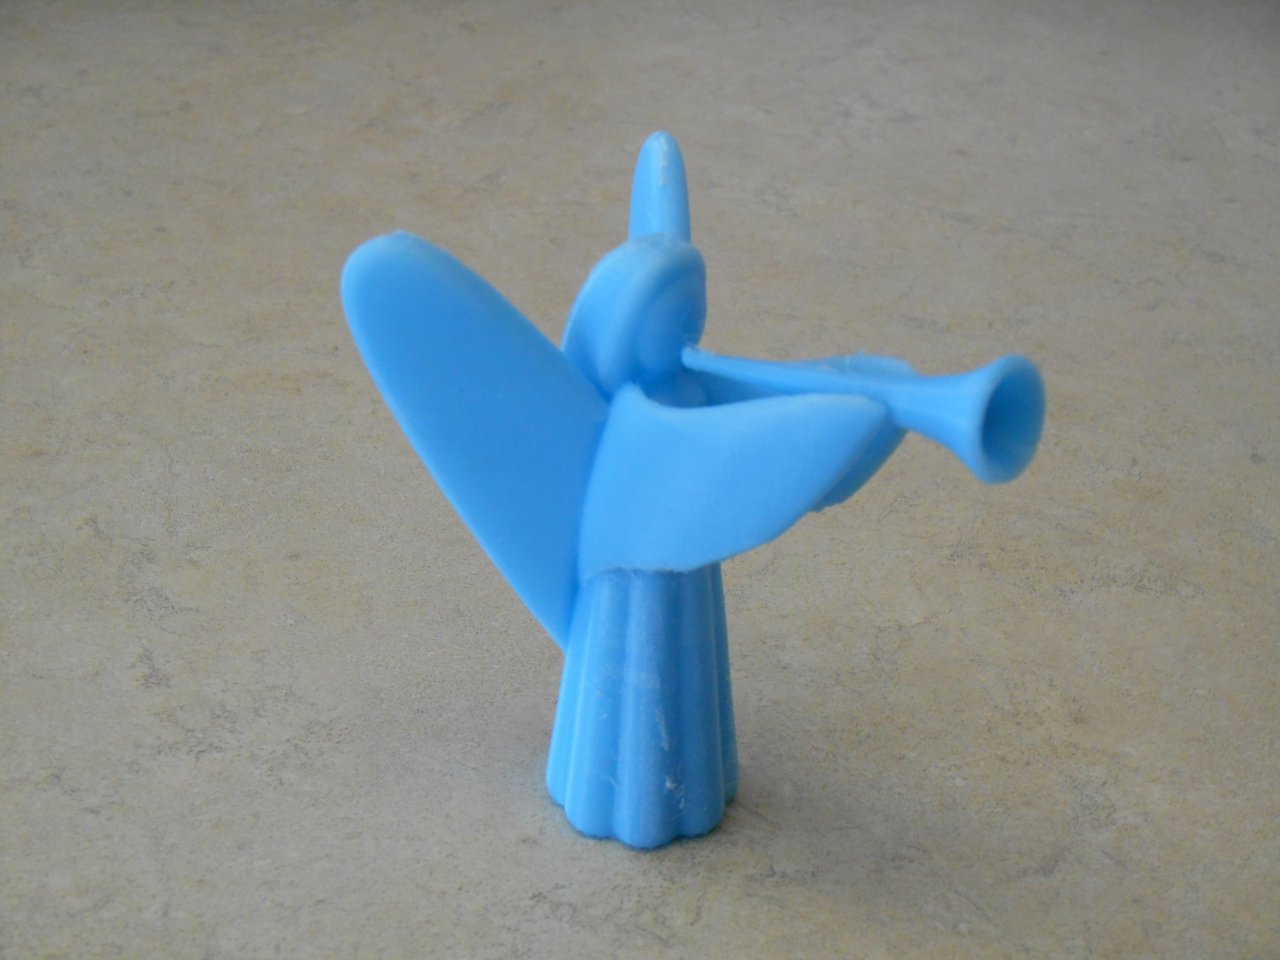
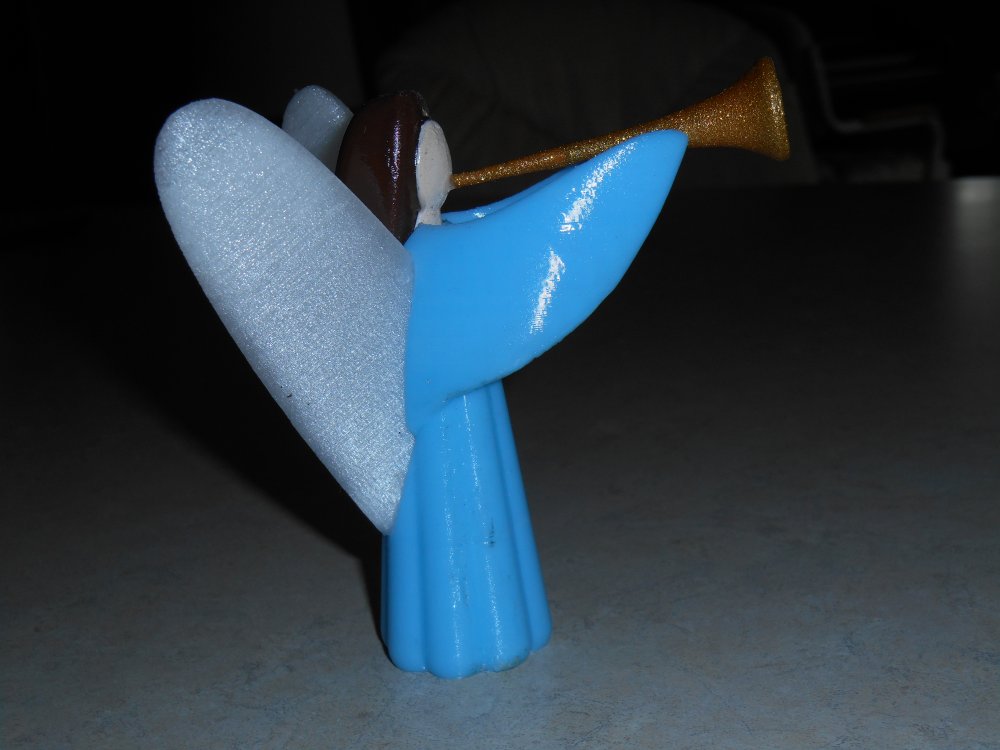
Here are some photos of a small version that printed in a single color plastic. The trumpet was 3-D printed separately but the rest of the figure was printed in one piece. Is about 2 inches tall.
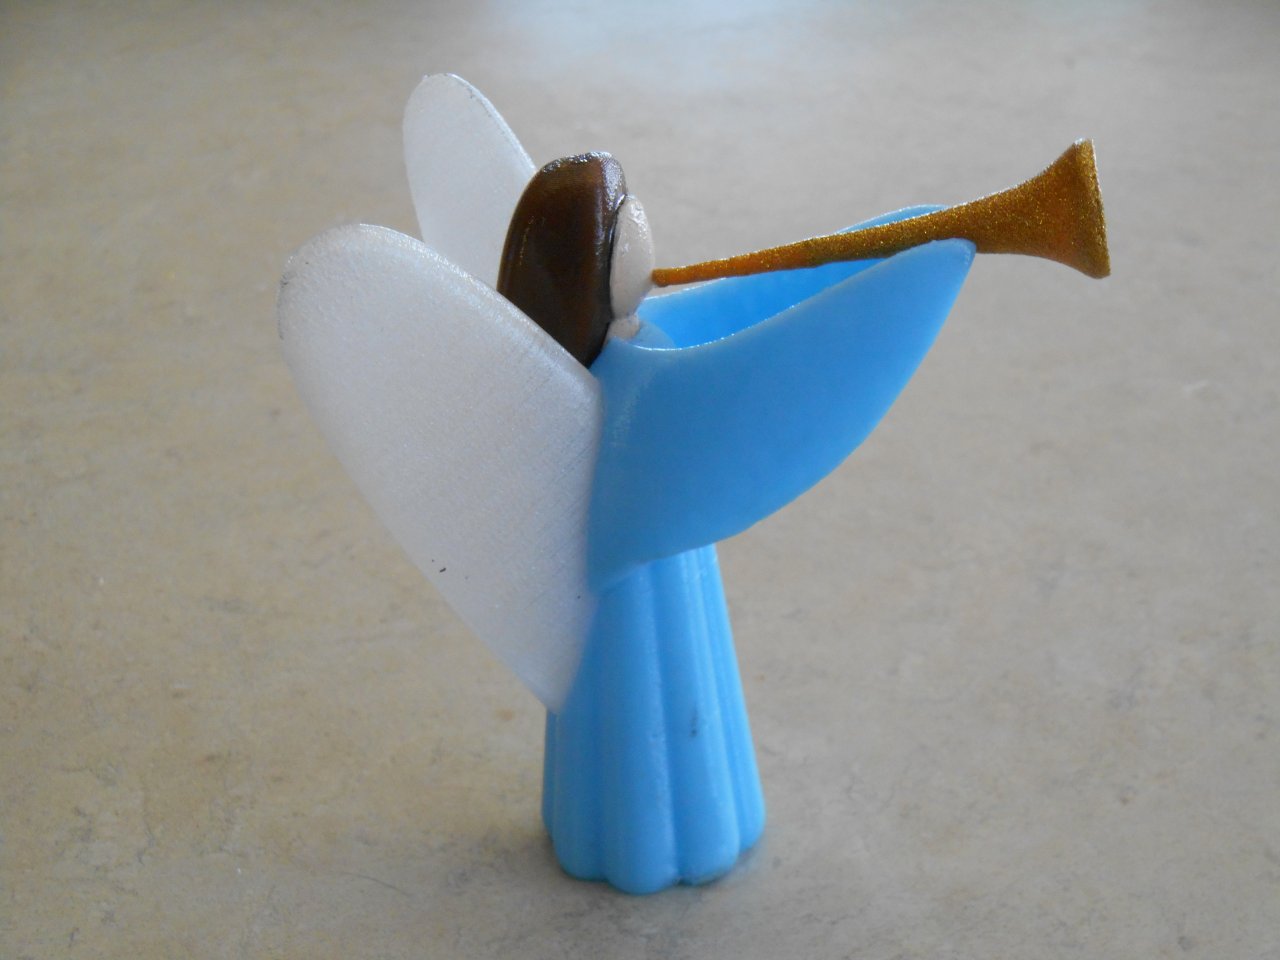
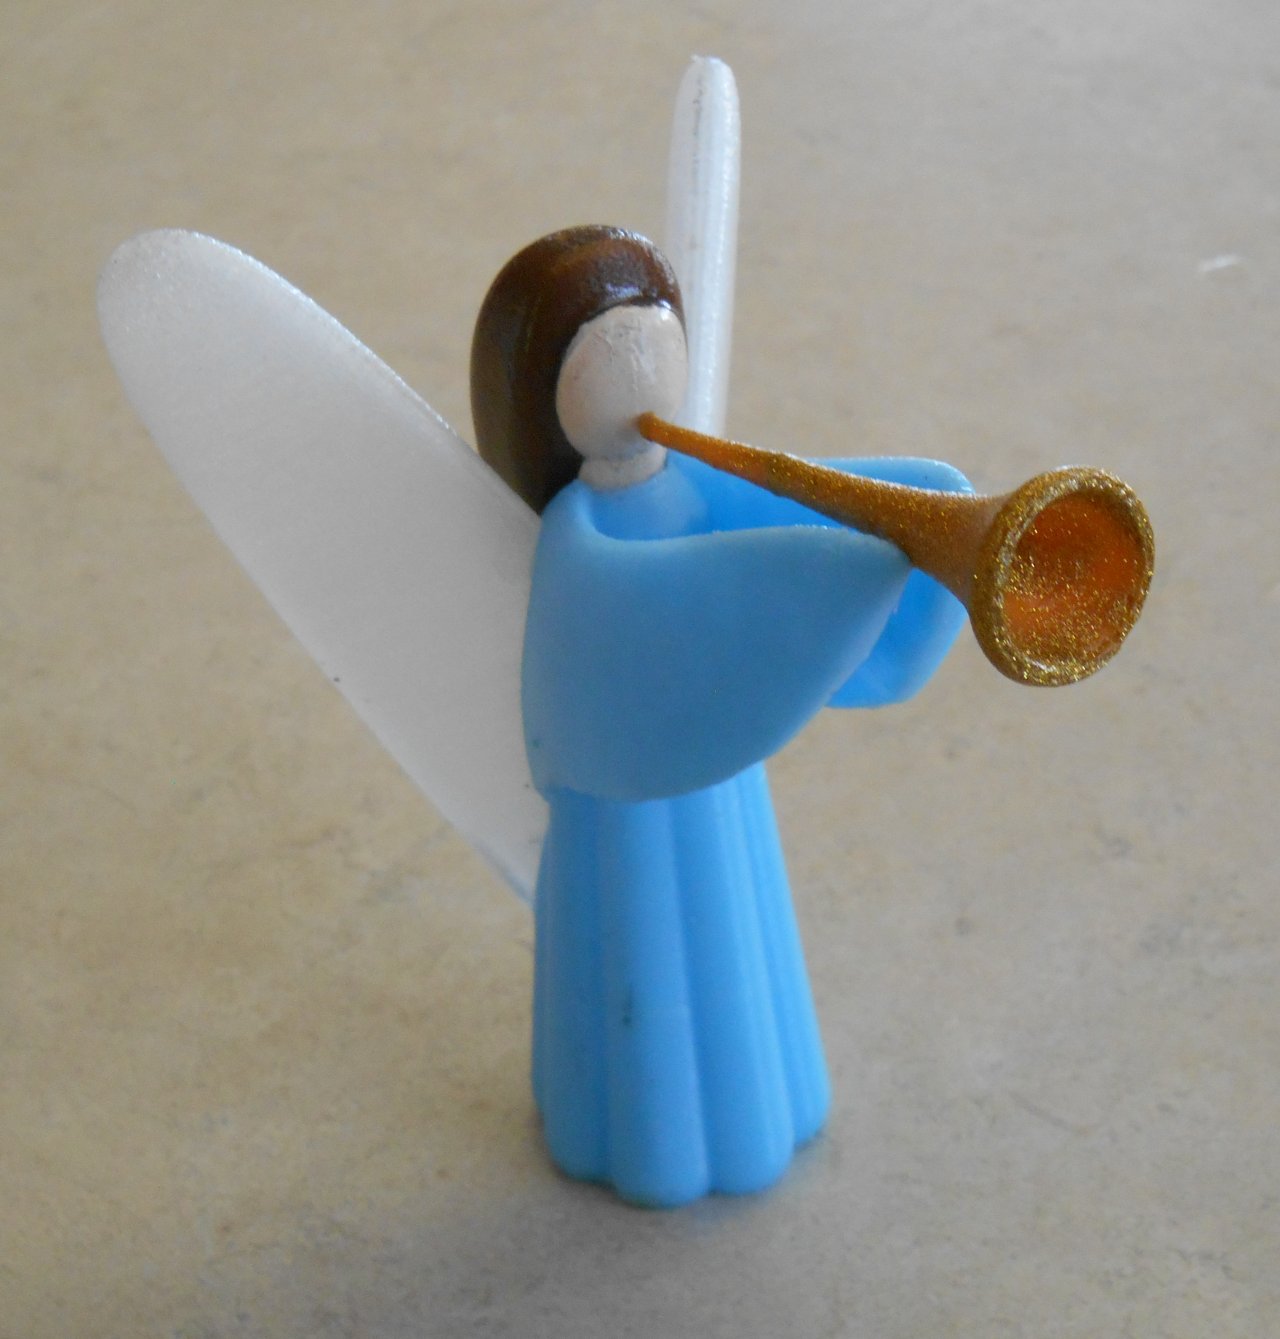
Next I printed a somewhat larger version about 3 1/2 or 4 inches tall in different kinds of plastic. The main body and arms are printed using sky-blue PLA plastic. The wings are printed in a transparent plastic called “t-glaze”. The end result is sort of a frosty translucent look. The hair was printed in dark brown PLA. It was difficult to find flesh colored plastic from the face so I printed it using the light blue and then we painted it with acrylic paint. The trumpet was printed in orange PLA and then coated with gold glitter paint. We use glue to put the pieces together. The angle of the hair is off by a little bit and does not line up with face perfectly. I may end up creating another version that we will assemble more carefully.
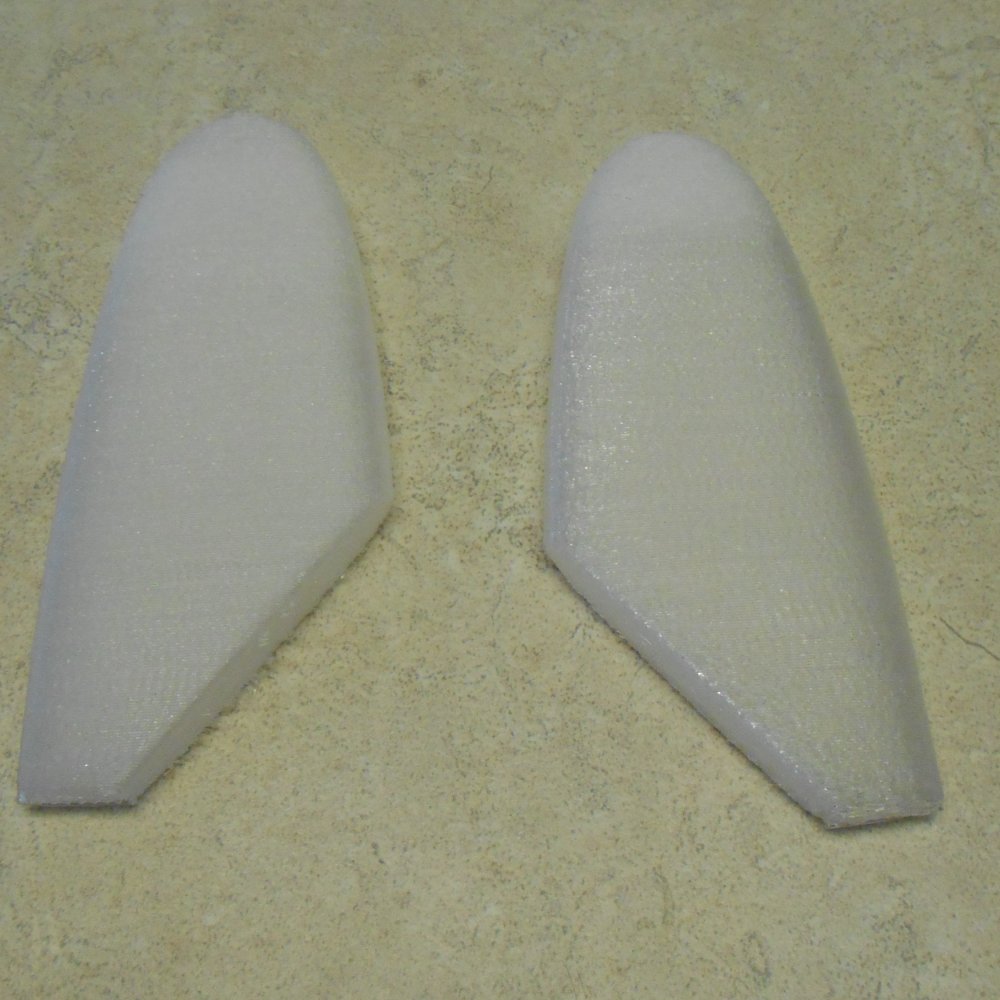
When I initially printed the wings I printed them both the same time but as the printhead went back and forth between the two objects it left an artifact in the middle of the wings as seen on the left. I then reprinted it printing them one time and got a clean set.
 |
 |
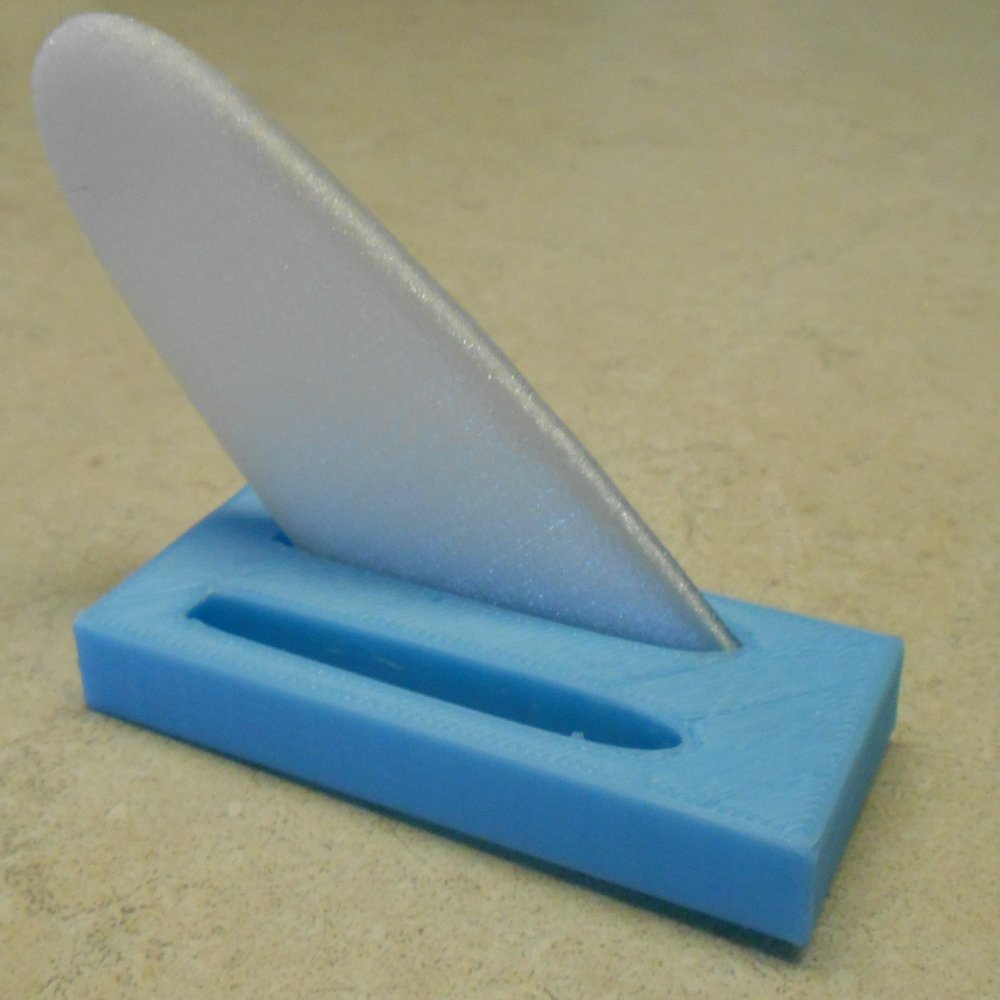
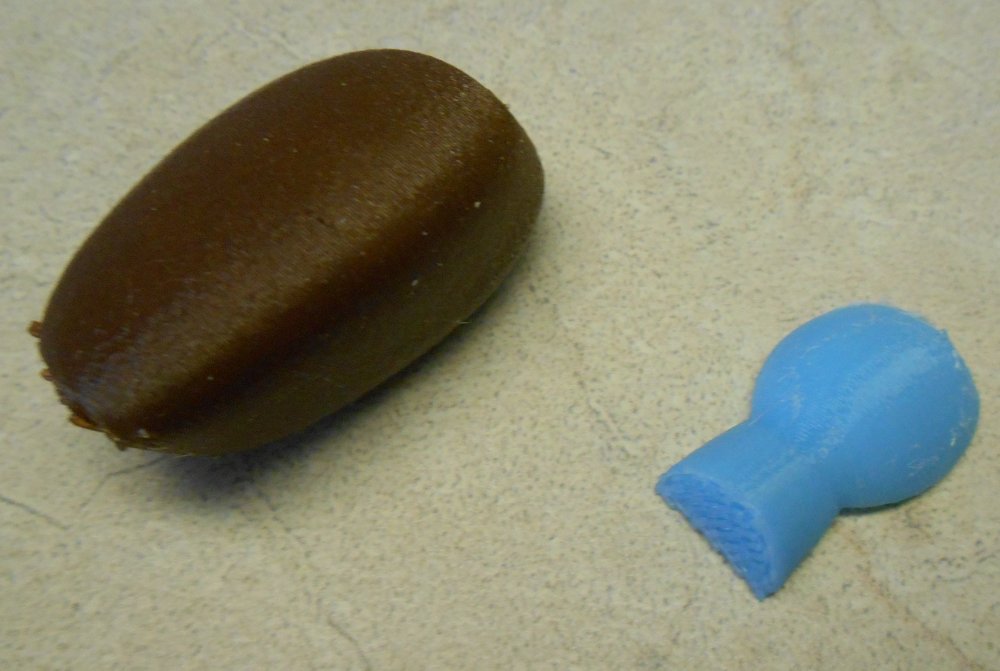
Before printing the body I printed a small test piece to see what tolerance I needed for the holes where the wings would be inserted as seen in the image on the left. On the right is shows the hair and the face before I painted it. Below that shows the body with the cutouts for the rings and the head.
 |
 |

When completed the entire model was sprayed with a clear coat which can be seen in this flash photo.
Here as a YouTube video describing the process that I used to convert the POV-Ray shapes into something that could be 3-D printed.
Here is a technical article giving more details about the software that I used.